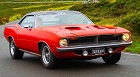
Rob & Stu's 63 Polara 500
Moderator: Moderators
-
Anonymous
-
bananaskin
- Posts: 4745
- Joined: Mon Sep 10, 07 4:00 pm
- Location: Hertfordshire
- Contact:
Looks excellent! 

<a href="http://s192.photobucket.com/albums/z238 ... banner.gif" target="_blank"><img src="http://i192.photobucket.com/albums/z238 ... banner.gif" border="0" alt="Photobucket"></a>
1970 Dodge Challenger 440-6
Move Over People Are Racing
James MMA/727
1970 Dodge Challenger 440-6
Move Over People Are Racing
James MMA/727

Finally got our 'restored' instrument cluster back from AutoInstruments last weekend.
This one is a spare we bought off ebay, as the speedo on the original one in the car needs attention (not the cable according to Speedy Cables). So we had them test & recalibrate all the gauges, and freshen up the lenses, needles & gauge faces.
You can just about see below that the original cluster (still in the car) has more of a chrome look to it than the one we bought as a spare, which has more painted surfaces. Shame we didnt notice this before AutoInst did the work, as they went ahead and restored it back to how they thought it would have been when new, ie new paint instead of new chrome. They said all the other 63 clusters they have done also had the same painted surfaces, but to their credit, said if we send it back, they will replate it to how we want it, f.o.c.
The last pics show the finished version with extra chrome
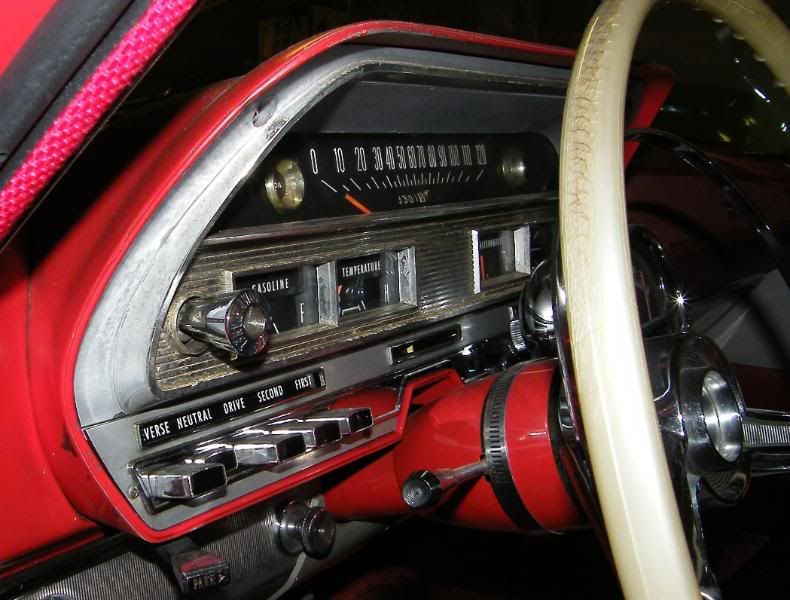
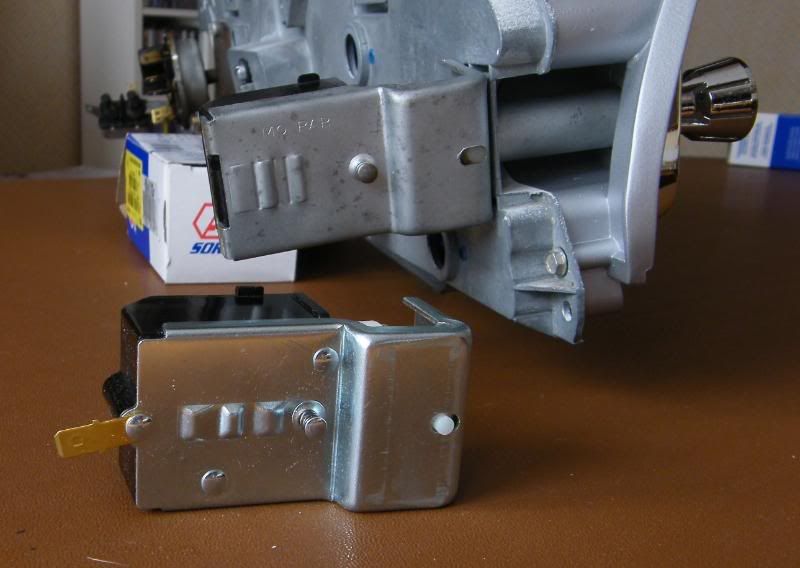
Just got to swap the headlamp switch over for a new one (our dimmer switch & dash lights dont work, so not taking a chance with this one).
Plus there's a bit of mazak (or whatever matl it is) bracketry missing on this spare one that's needed to mount it in the dashboard, so we'll have to make up a little bit out of sheet metal to replace it.
original cluster still in car
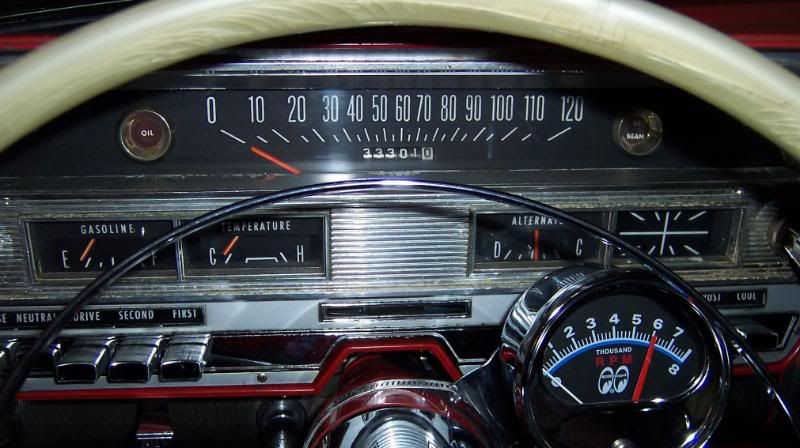
original cluster still in car
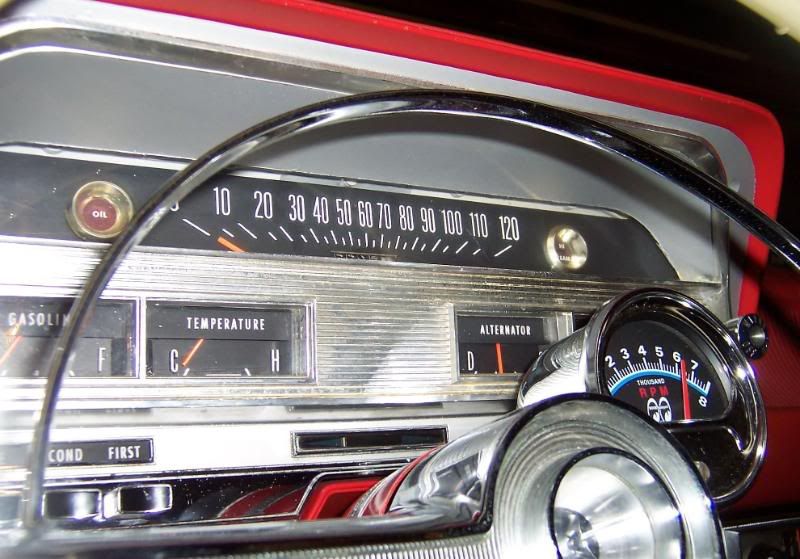
original cluster still in car
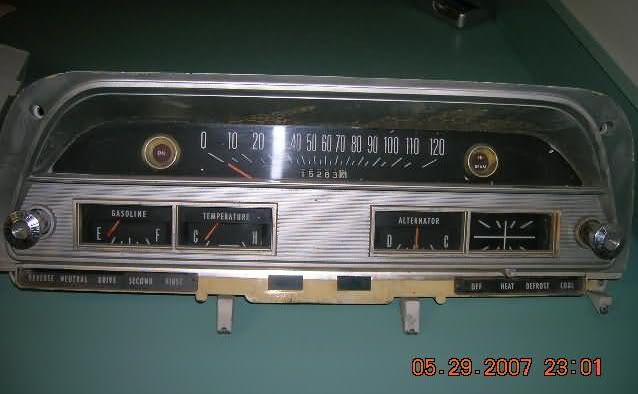
spare we bought off ebay, before resto
1st attempt - returned for replating
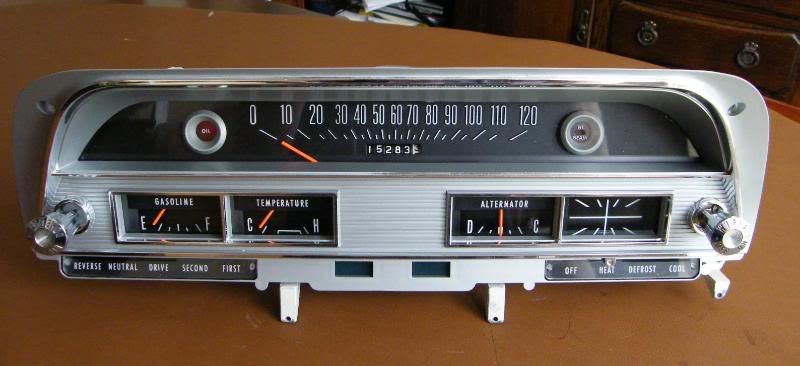
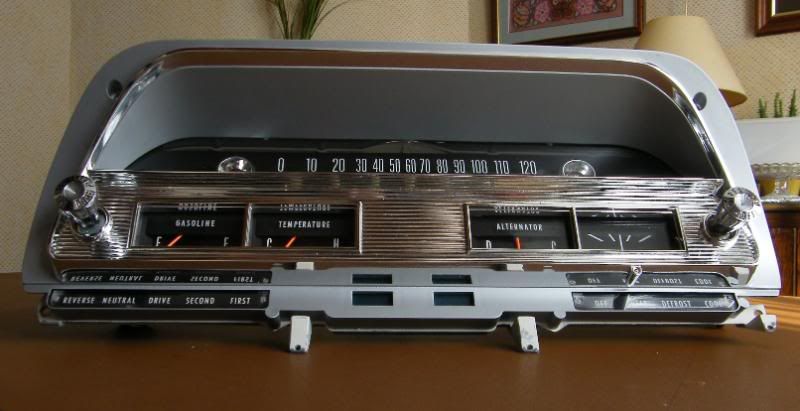
new cluster - finished article
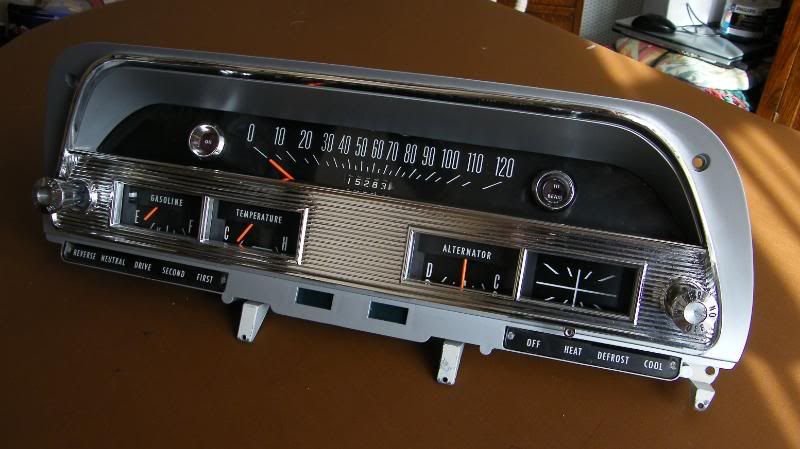
new cluster - finished article
headlamp switch to be swapped
new cluster - finished article - separated to check h'lamp switch fitting
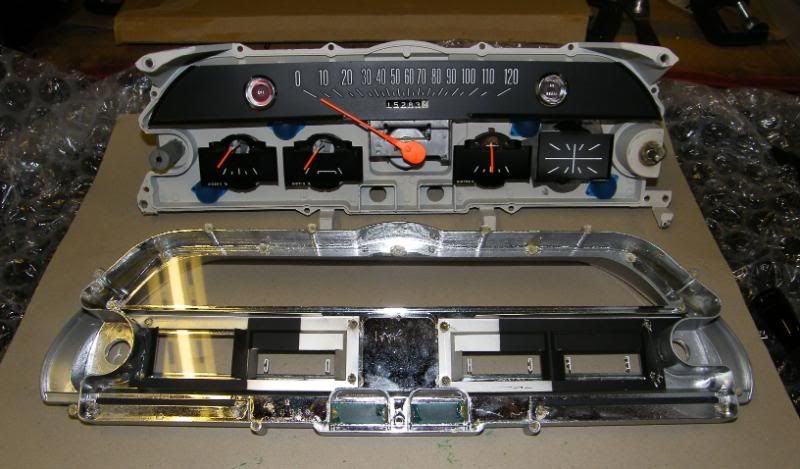
new cluster - finished article - separated to check h'lamp switch fitting

Stu's trimmed the door panels that I previously said were too long, and fitted them, and we've started fitting the new TTI system (pics to follow), so we'll finish that before we start messing about with the dash.
Fun times
This one is a spare we bought off ebay, as the speedo on the original one in the car needs attention (not the cable according to Speedy Cables). So we had them test & recalibrate all the gauges, and freshen up the lenses, needles & gauge faces.
You can just about see below that the original cluster (still in the car) has more of a chrome look to it than the one we bought as a spare, which has more painted surfaces. Shame we didnt notice this before AutoInst did the work, as they went ahead and restored it back to how they thought it would have been when new, ie new paint instead of new chrome. They said all the other 63 clusters they have done also had the same painted surfaces, but to their credit, said if we send it back, they will replate it to how we want it, f.o.c.
The last pics show the finished version with extra chrome
Just got to swap the headlamp switch over for a new one (our dimmer switch & dash lights dont work, so not taking a chance with this one).
Plus there's a bit of mazak (or whatever matl it is) bracketry missing on this spare one that's needed to mount it in the dashboard, so we'll have to make up a little bit out of sheet metal to replace it.
original cluster still in car
original cluster still in car
original cluster still in car
spare we bought off ebay, before resto
1st attempt - returned for replating
new cluster - finished article
new cluster - finished article
headlamp switch to be swapped
new cluster - finished article - separated to check h'lamp switch fitting
new cluster - finished article - separated to check h'lamp switch fitting
Stu's trimmed the door panels that I previously said were too long, and fitted them, and we've started fitting the new TTI system (pics to follow), so we'll finish that before we start messing about with the dash.
Fun times
Last edited by RobTwin on Wed Feb 27, 08 10:12 pm, edited 1 time in total.

These are the trimmed door panels Stu got fitted at the weekend.
Vinyl peeled back, card trimmed 6mm, and vinyl re-glued. At least the doors shut now, which is nice.
As with most of these things, now the paint is starting to look more tired, with bright new panels next to it
Mind you, the door shuts have never been repainted so it is 44 1/2 yrs old
Vinyl peeled back, card trimmed 6mm, and vinyl re-glued. At least the doors shut now, which is nice.
As with most of these things, now the paint is starting to look more tired, with bright new panels next to it
Mind you, the door shuts have never been repainted so it is 44 1/2 yrs old
-
bananaskin
- Posts: 4745
- Joined: Mon Sep 10, 07 4:00 pm
- Location: Hertfordshire
- Contact:
Looking good!
<a href="http://s192.photobucket.com/albums/z238 ... banner.gif" target="_blank"><img src="http://i192.photobucket.com/albums/z238 ... banner.gif" border="0" alt="Photobucket"></a>
1970 Dodge Challenger 440-6
Move Over People Are Racing
James MMA/727
1970 Dodge Challenger 440-6
Move Over People Are Racing
James MMA/727
Pics of TTI system fitted 
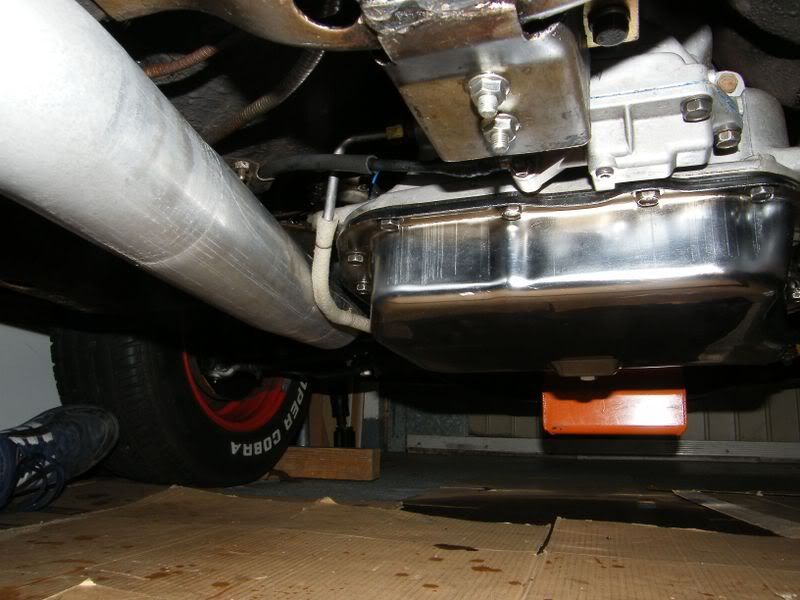
After a few mins cranking, started 'her' up for the 1st time since last October, and left it running and checked for leaks. Couldn't find any so turned it off once we'd become intoxicated by the fumes as we didnt want to burn thru the trans line that now runs right along the 3" exh pipe next to the trans pan - the only hiccup really
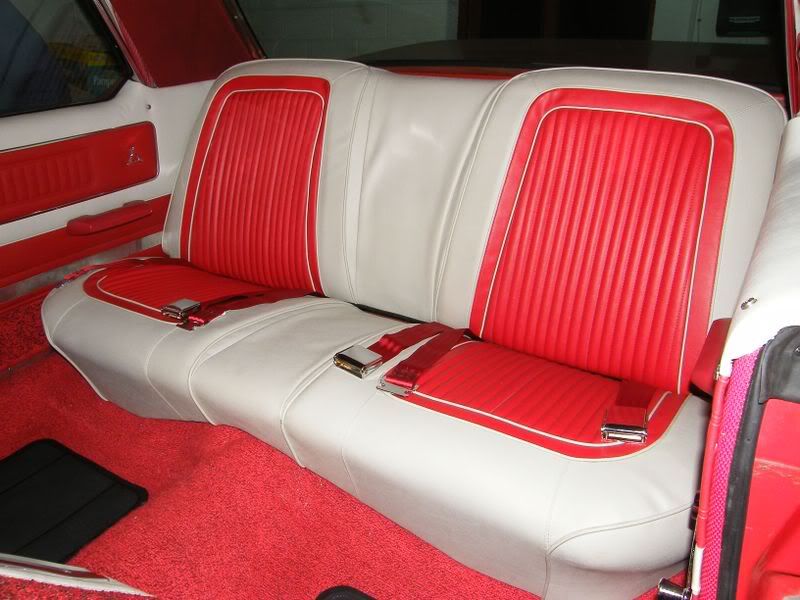
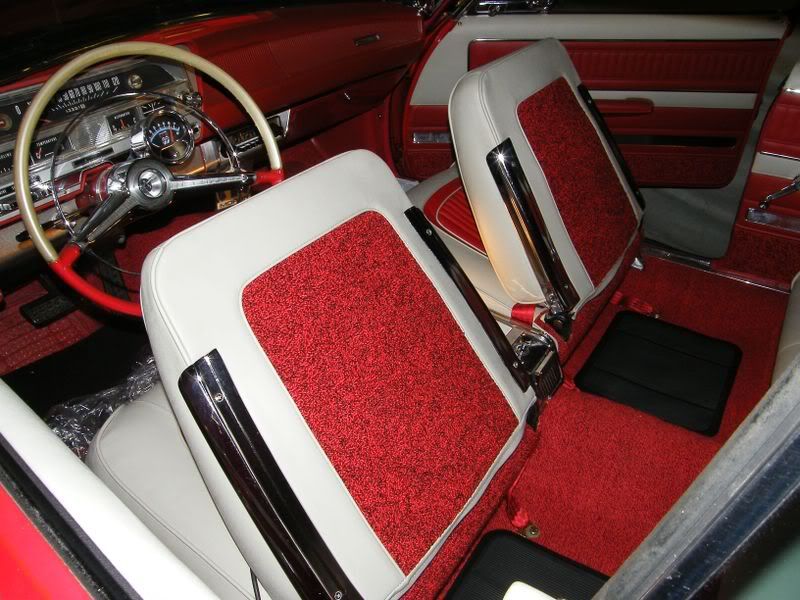
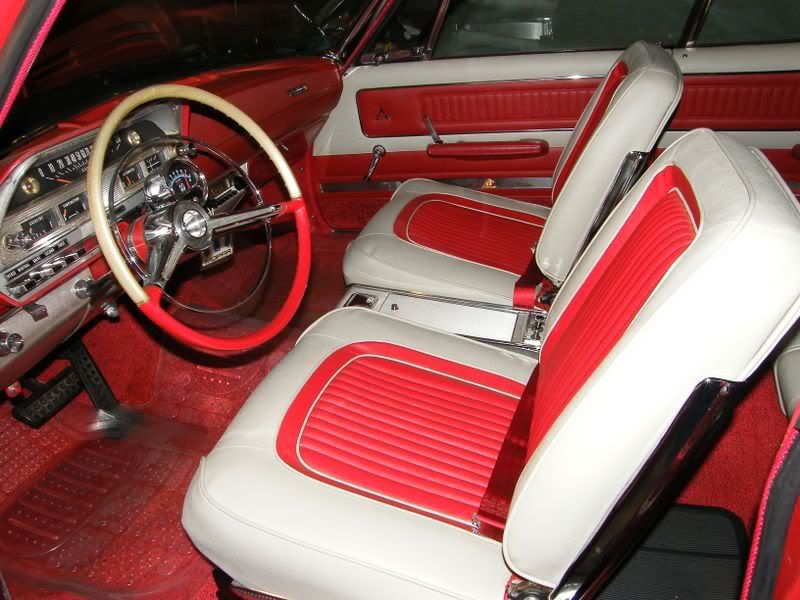
Rears seat in too, after going back to the upholsterers to try & smooth out some of the material that was a bit baggy
Still not perfect, but
Just need to sort the trans line, and re-fit the park mechanism that we (Stu actually ) fitted with a new gasket (cheers Blue!). Park now doesnt work - must be a spring or summat that didnt go back in correctly
Yeah we know it needs a wash. That rear panel under the bumper will need a bit of massaging when we get round to sorting the bodywork. Doesnt look like it, but there's 5-6mm ish of clearance above the tailpipes.
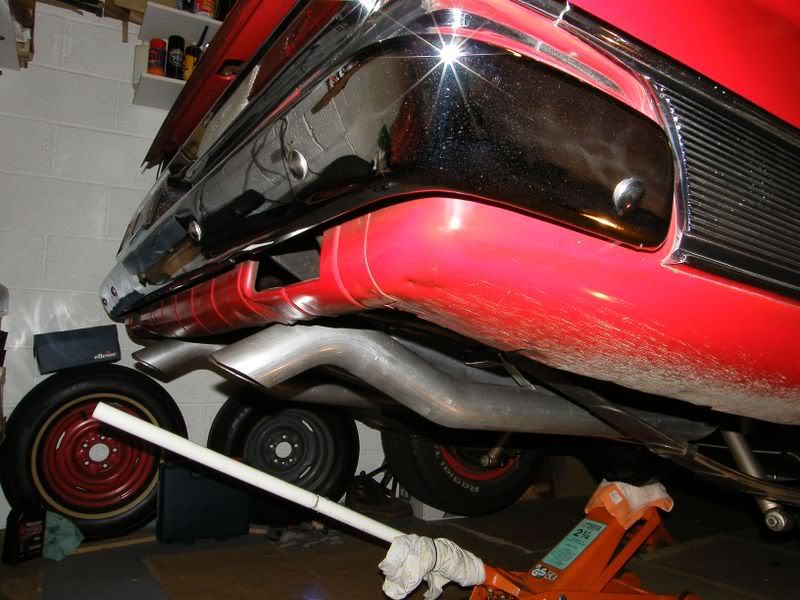
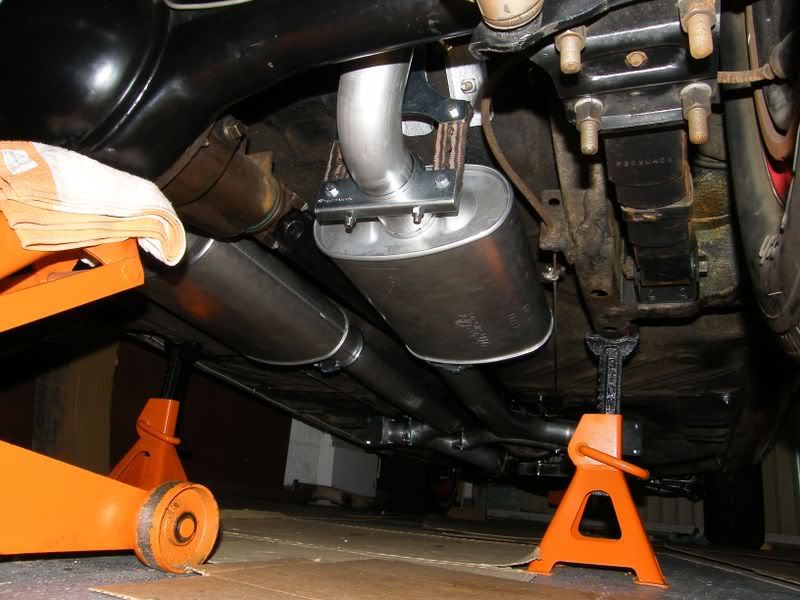
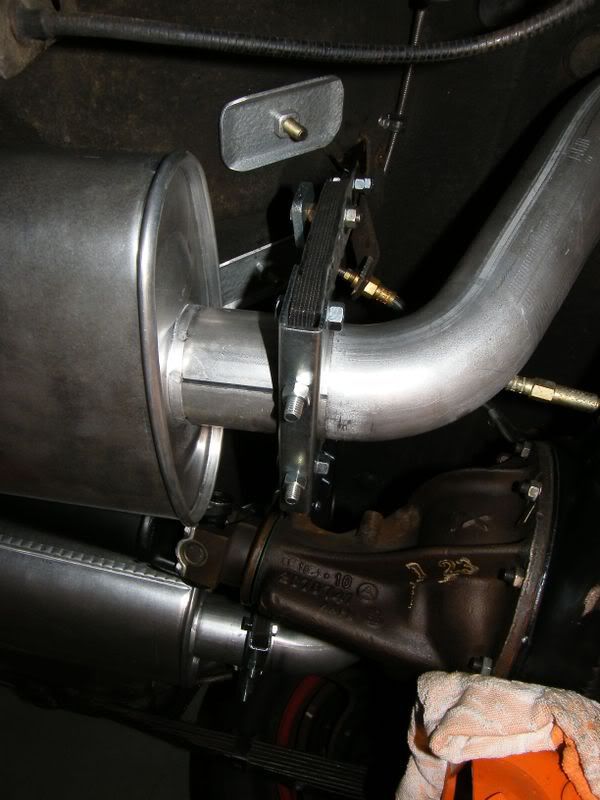
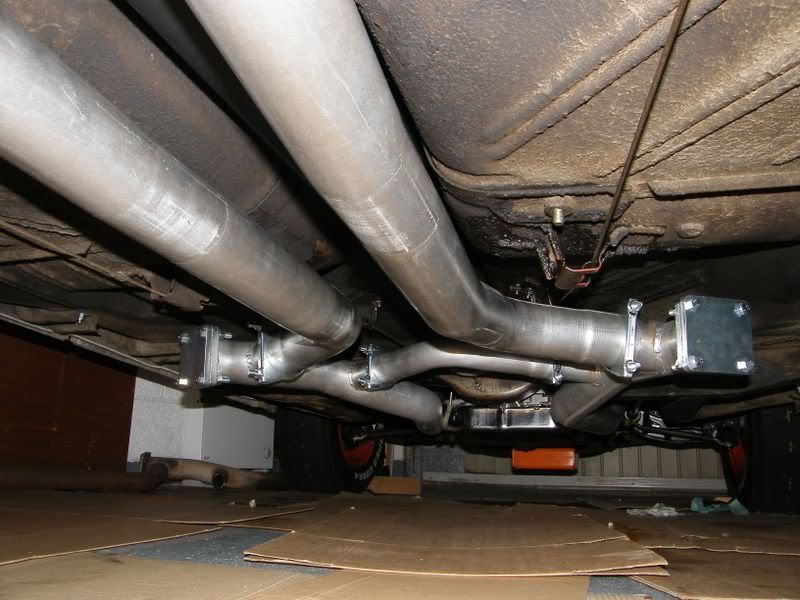
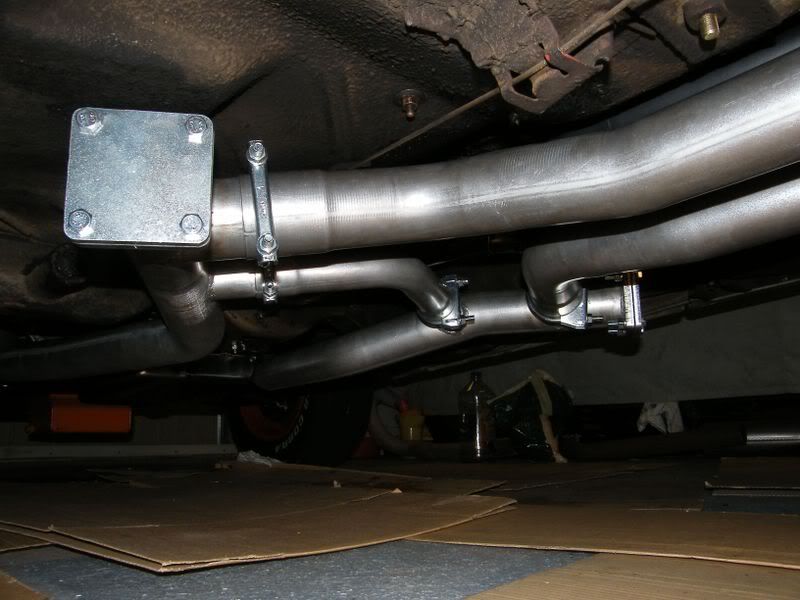

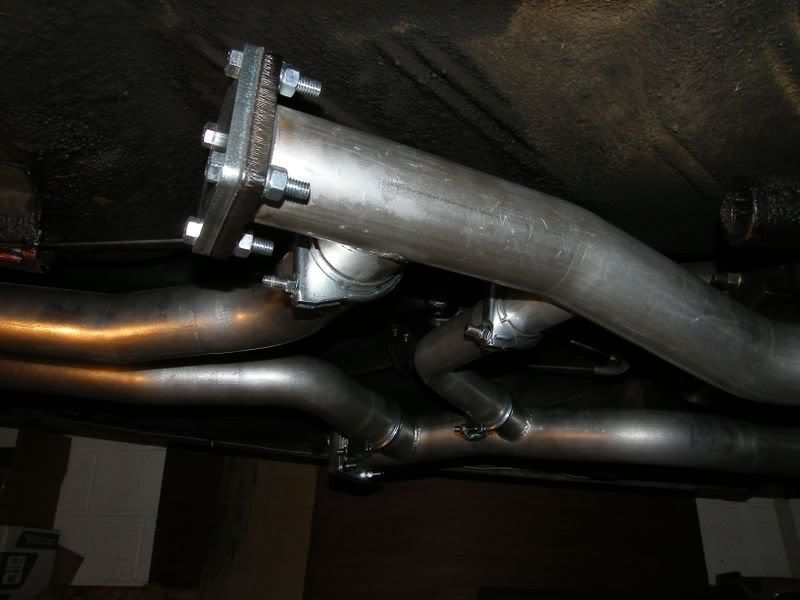
trans line needs re-routing.... or bending
Still a nasty bit in between the seat backs, but it hasnt been sat in yet so may ride up with wear
After a few mins cranking, started 'her' up for the 1st time since last October, and left it running and checked for leaks. Couldn't find any so turned it off once we'd become intoxicated by the fumes
Rears seat in too, after going back to the upholsterers to try & smooth out some of the material that was a bit baggy
Still not perfect, but
Just need to sort the trans line, and re-fit the park mechanism that we (Stu actually
Yeah we know it needs a wash. That rear panel under the bumper will need a bit of massaging when we get round to sorting the bodywork. Doesnt look like it, but there's 5-6mm ish of clearance above the tailpipes.
trans line needs re-routing.... or bending
Still a nasty bit in between the seat backs, but it hasnt been sat in yet so may ride up with wear