Rob & Stu's 69 Sport Satellite
Moderator: Moderators


Thanks Bob'n'Steve 
I meant to say, as it's not that obvious in the pic, the only visible evidence that the radio has been modded, is the small LED on the dial, between the '14' & '16', that indicates the current status, ie (according to the instructions):
GREEN - on FM waveband
ORANGE - on FM stereo broadcast
RED - on AM reception
OFF - on external audio input
FLASHING ORANGE - set up mode for balance and fader
dunno how soon we'll get to try it out tho

Also spent a bit of time under the car on Sunday, getting the exhaust sorted.
The plan was to see what we need to do, or to get done, to get the various bits we have into a useable system.
The front section (from the cast manifolds to the mufflers) that was on the car before all this started, was getting pretty rusty, and was originally made by Pipe Craft in Essex to fit to the 70-71 cast manifolds that we had on the car.
Looking at that part of the system now, I find it hard to believe a professional outfit whose sole purpose in life is/was to make exhaust systems, could have made such a poor job of the bends & welds!
So when we saw an Accurate front section to suit the manifolds we now have (68-69) on ebay (thanks to Miles on here for the heads up ), we jumped at it and got it as the only bidder.
Offered it up and it fits fine around the starter, torsion bars & prob but was a bit close to the kickdown linkage, so we've modified that to give about 1/4" clearance (see pic).
Surprisingly, the mufflers we had on the car fit fine with the new front section and the 'PipeCraft' over axle pipes that were on there before. They're not pretty either but will do for now. Certainly good enough to get it to the MOT. If we find it's blowing once we get it started and needs any major reconstruction, we've got Barry 'the bender' Grimes on stand-by to sort it out for us.
Gonna give the mufflers and the prop another lick of paint before we fix it all on for good, so I'll get some more pics up once it's finished.
Next episode - front brakes & trans cooler finished
The plan was to see what we need to do, or to get done, to get the various bits we have into a useable system.
The front section (from the cast manifolds to the mufflers) that was on the car before all this started, was getting pretty rusty, and was originally made by Pipe Craft in Essex to fit to the 70-71 cast manifolds that we had on the car.
Looking at that part of the system now, I find it hard to believe a professional outfit whose sole purpose in life is/was to make exhaust systems, could have made such a poor job of the bends & welds!
So when we saw an Accurate front section to suit the manifolds we now have (68-69) on ebay (thanks to Miles on here for the heads up
Offered it up and it fits fine around the starter, torsion bars & prob but was a bit close to the kickdown linkage, so we've modified that to give about 1/4" clearance (see pic).
Surprisingly, the mufflers we had on the car fit fine with the new front section and the 'PipeCraft' over axle pipes that were on there before. They're not pretty either but will do for now. Certainly good enough to get it to the MOT. If we find it's blowing once we get it started and needs any major reconstruction, we've got Barry 'the bender' Grimes on stand-by to sort it out for us.
Gonna give the mufflers and the prop another lick of paint before we fix it all on for good, so I'll get some more pics up once it's finished.
Next episode - front brakes & trans cooler finished
- Attachments
-
- bit close...
- DSCF8251a.JPG (143.25 KiB) Viewed 2010 times
-
- 'library pictures' !
- ACCURATE.jpg (77.75 KiB) Viewed 2010 times
Gradual progress at Twinster Towers (Hitchin branch).
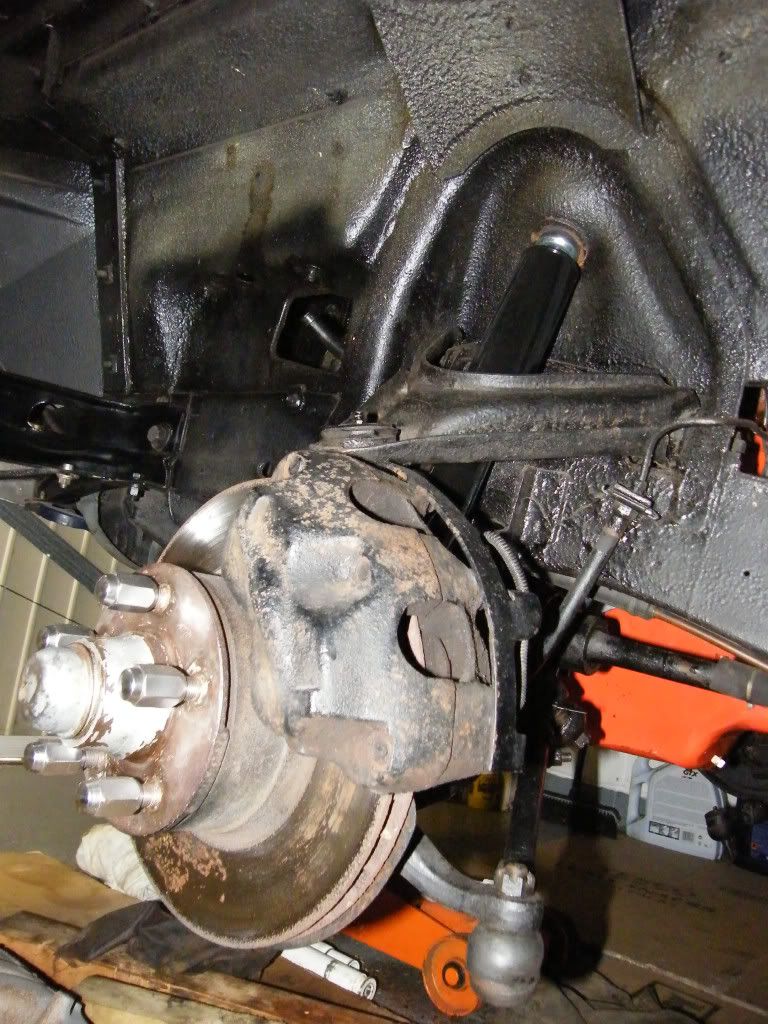
I'd have posted some pics of the brakes before now but my indoor-with-artificial-lighting shots are a bit dark to date, so I'll see if I can get the garage door open to shed some light, as it were
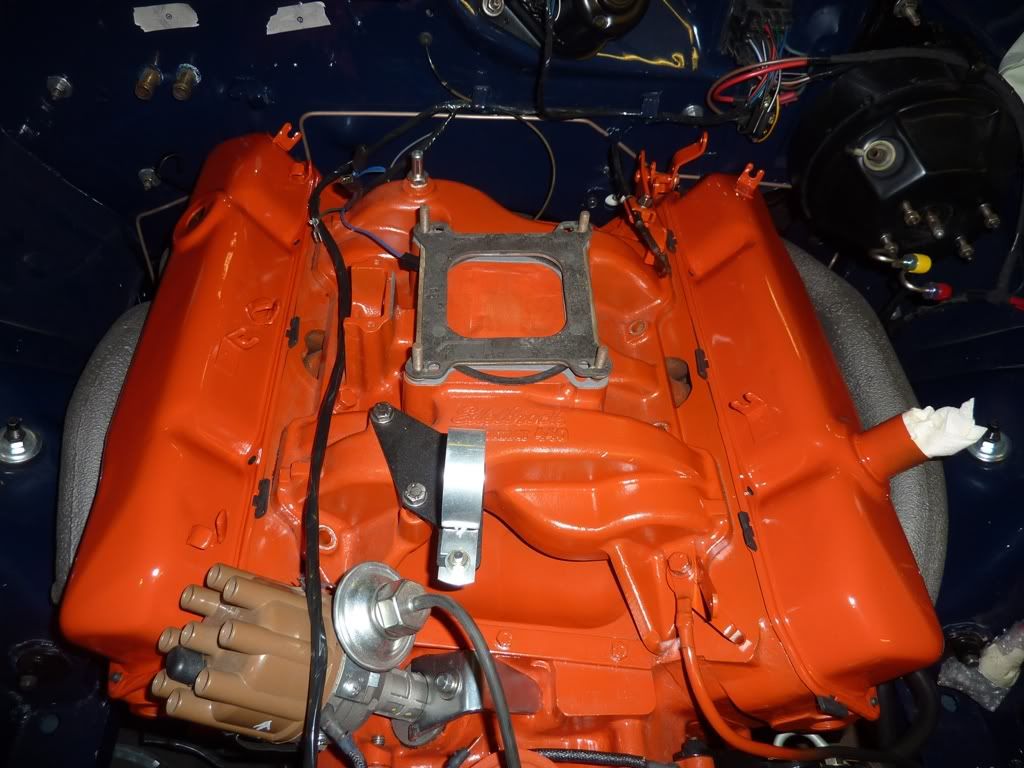
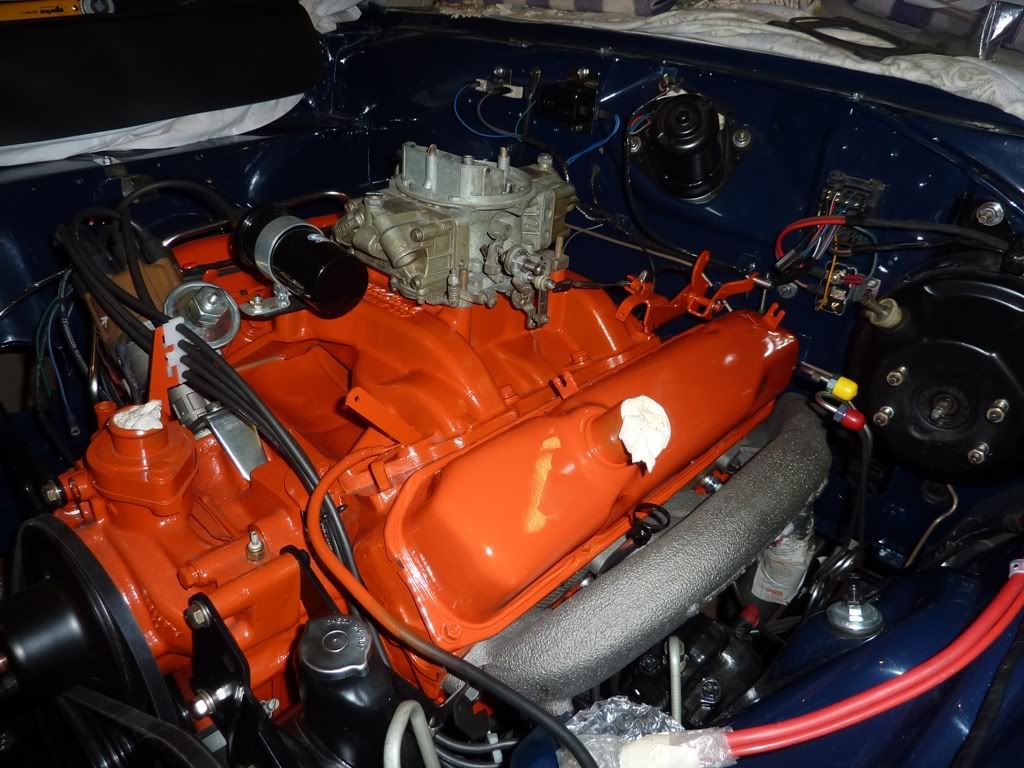
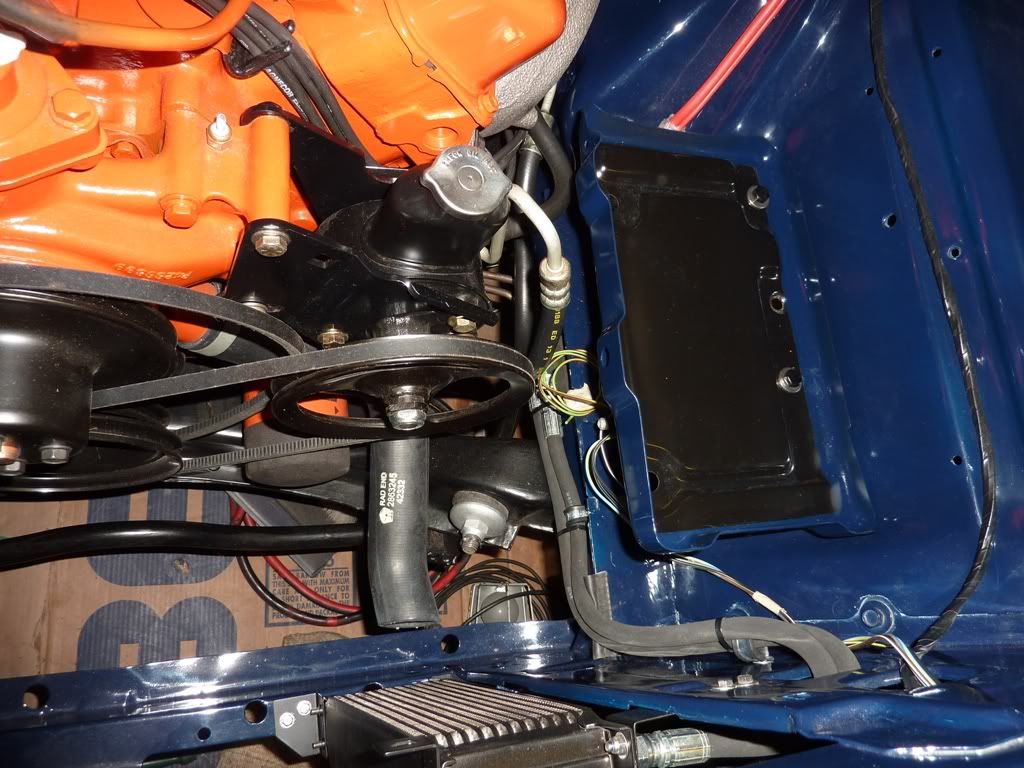
Trans cooler all sorted now, and now we have finally got some street hemi paint from Mancini's (via Ron Fenton, thanks Ron), we can get on and finish the engine bay stuff that we've been waiting to do
The valve covers needed a repaint too, as they were a bit thin when we got the engine back. Did that last weekend.
I've started tidying up the steering coloumn too so will get some pics of that when it's back together.
Nuts/bolts/washers needed painting as Paul K painted the engine parts before assembly, so Stu's now done the majority of those bits
Tabs still need trimming off the valve cover gaskets

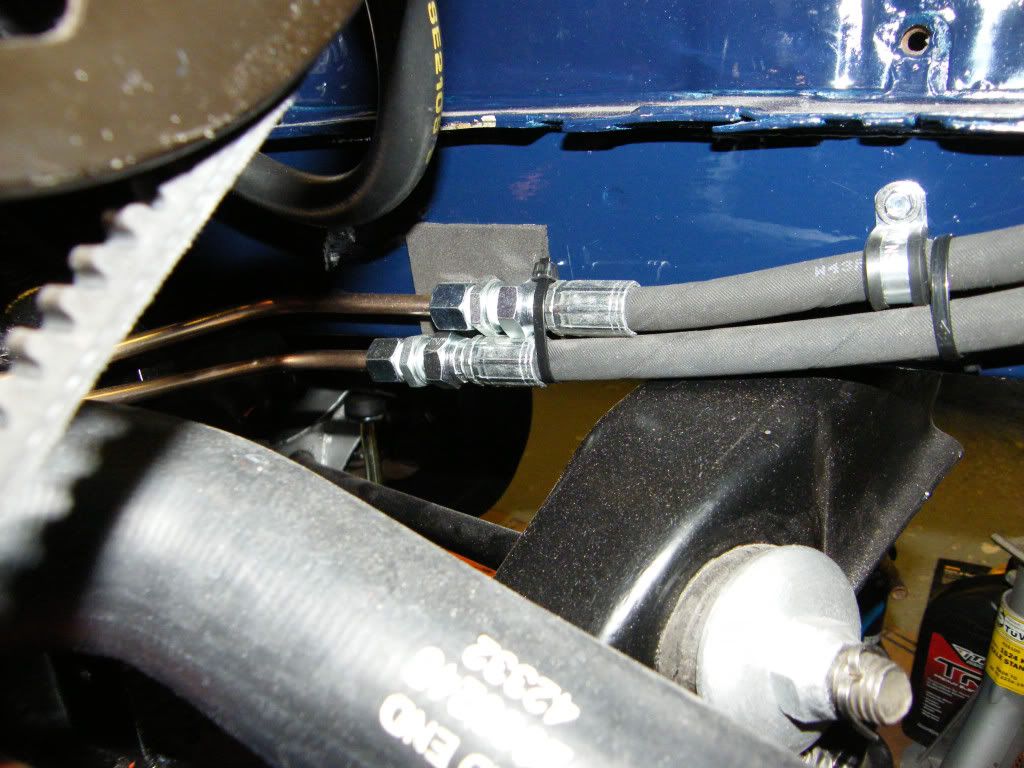
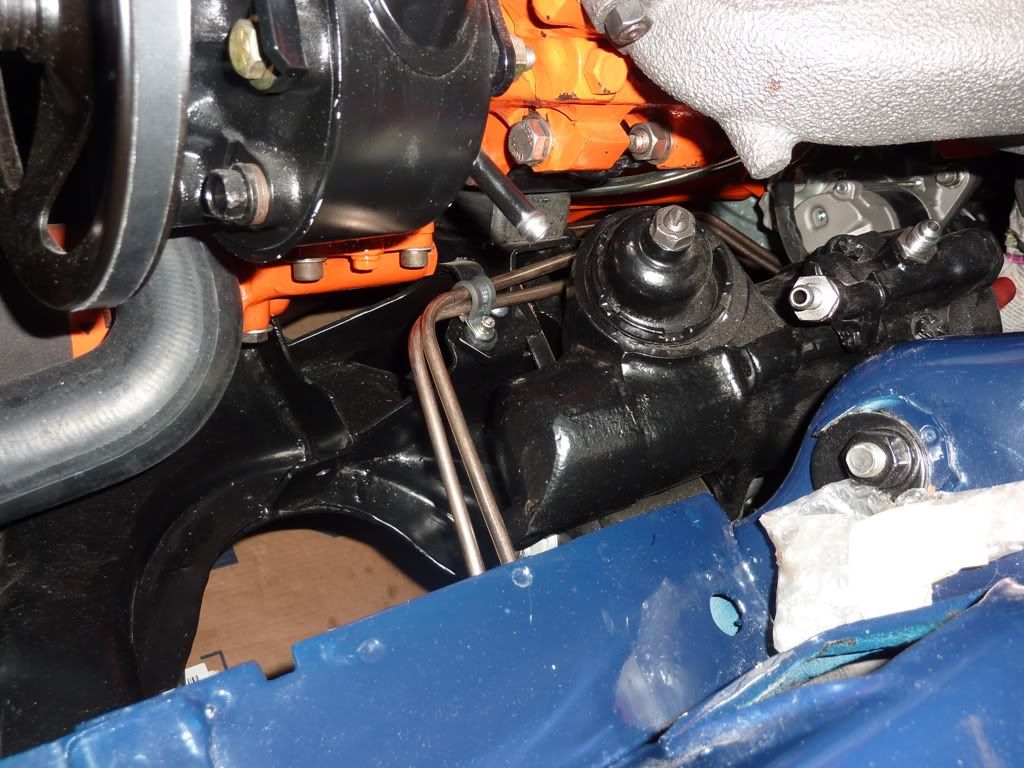
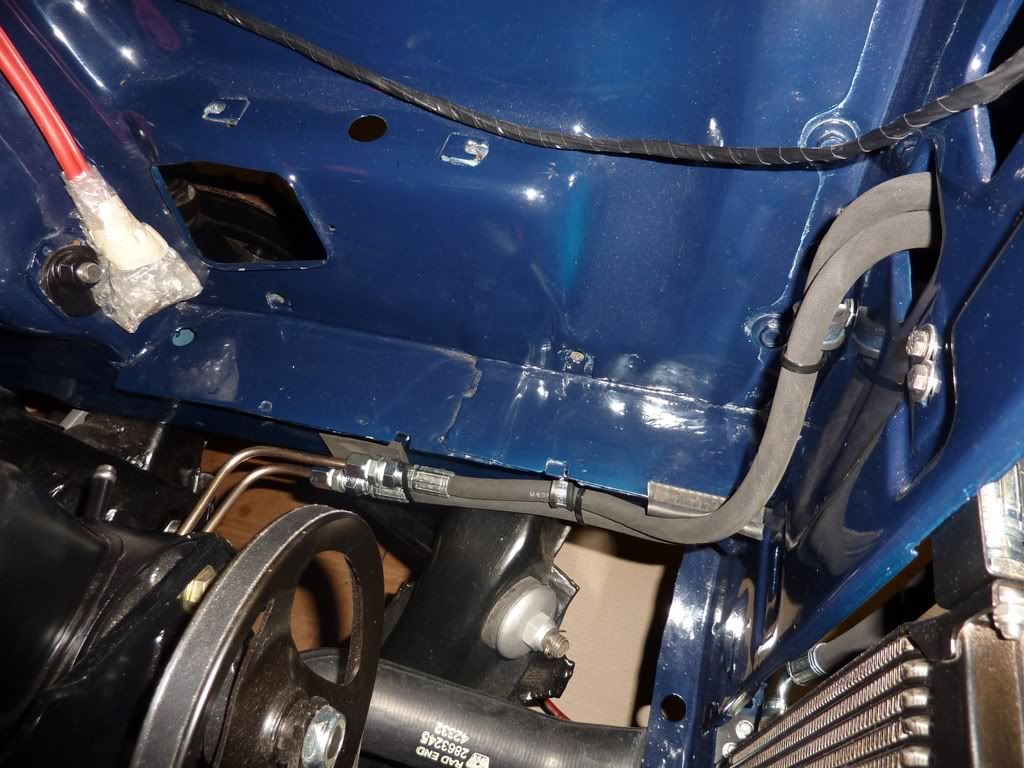
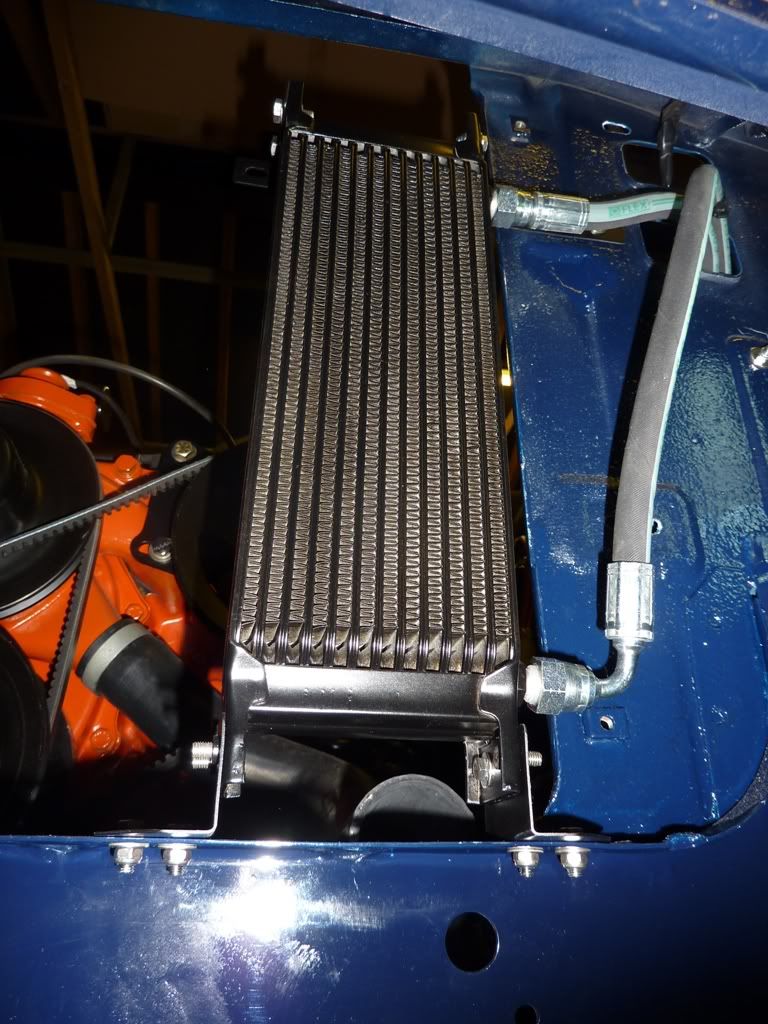
Speed Flow trans cooler with pukka rubber hoses & home-made hard lines
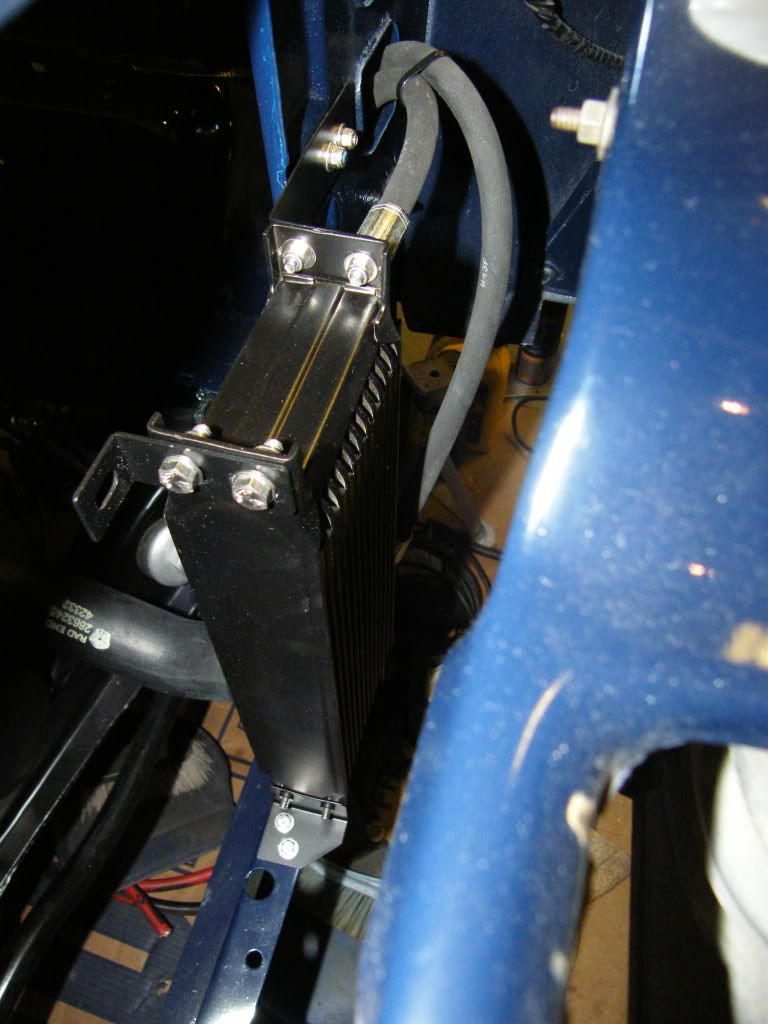
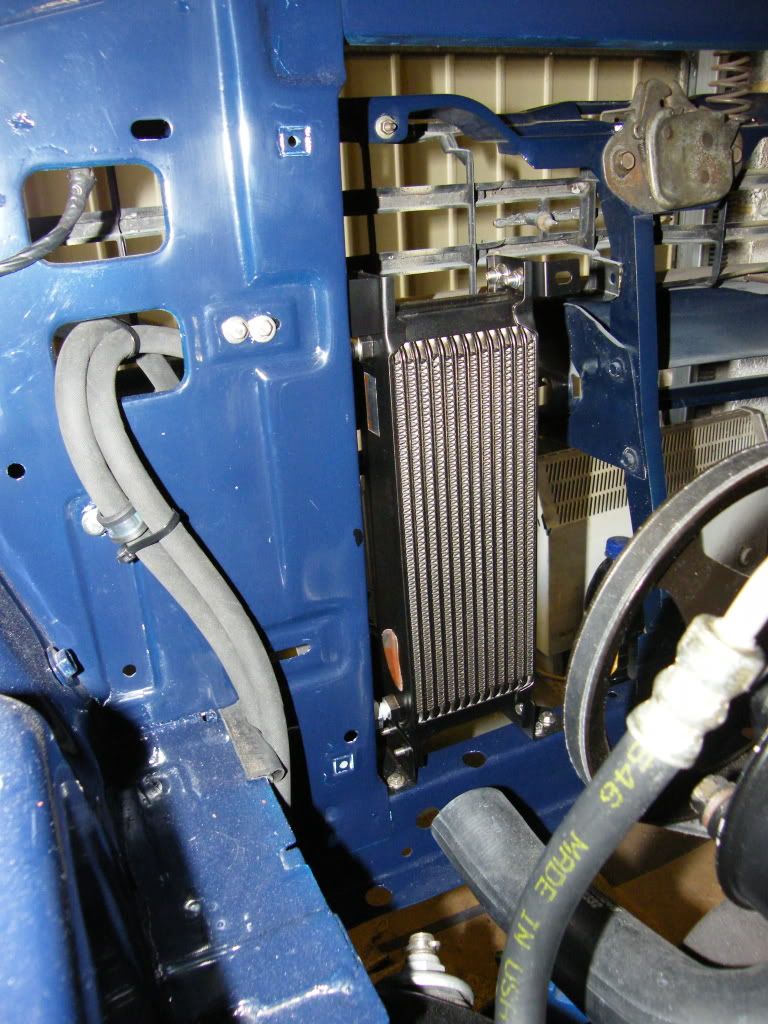
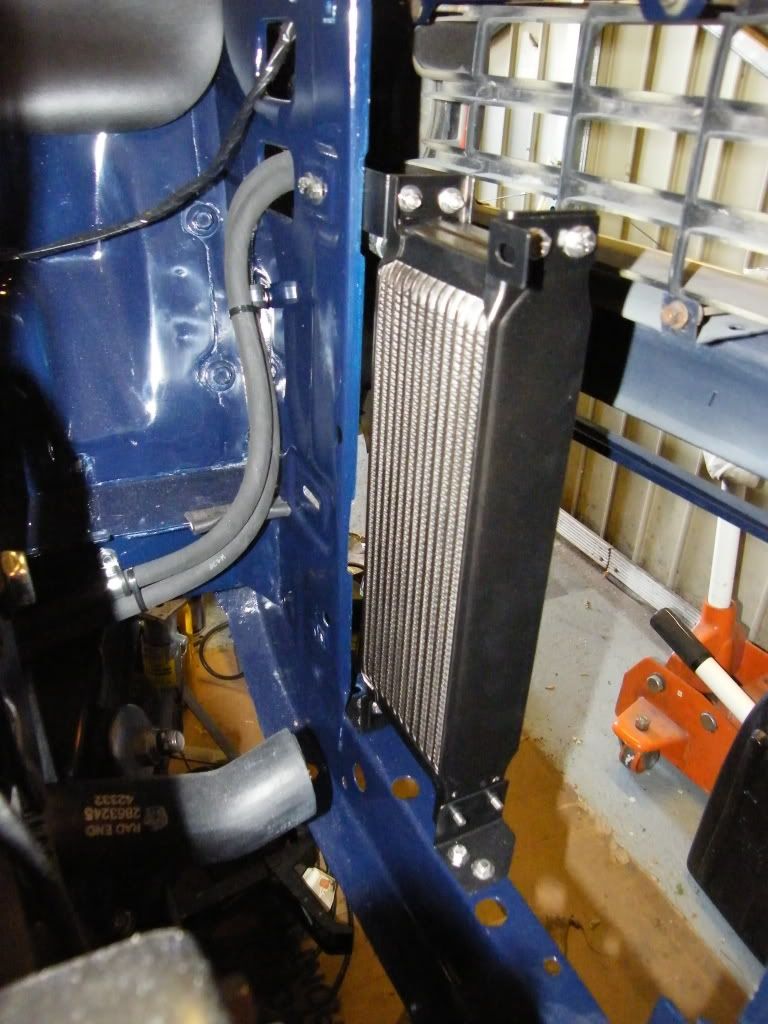
Transition from hard lines to rubber hoses should be hidded when battery tray is refitted to stock location (been in trunk since '87 )
)
Sorry about the dust
Been pondering where to fit the FBO 'orange box' (that's actually black). Think we've decided on just below the stock ballast resistor pos'n but wherever we put it, it will look out of place as the car didnt have one (orange version or otherwise) originally and the gold coloured/plated bit sticks out like the proverbial sore wotsit.
More pics to follow after the weekend, hopefully!
I'd have posted some pics of the brakes before now but my indoor-with-artificial-lighting shots are a bit dark to date, so I'll see if I can get the garage door open to shed some light, as it were
Trans cooler all sorted now, and now we have finally got some street hemi paint from Mancini's (via Ron Fenton, thanks Ron), we can get on and finish the engine bay stuff that we've been waiting to do
The valve covers needed a repaint too, as they were a bit thin when we got the engine back. Did that last weekend.
I've started tidying up the steering coloumn too so will get some pics of that when it's back together.
Nuts/bolts/washers needed painting as Paul K painted the engine parts before assembly, so Stu's now done the majority of those bits
Tabs still need trimming off the valve cover gaskets
Speed Flow trans cooler with pukka rubber hoses & home-made hard lines
Transition from hard lines to rubber hoses should be hidded when battery tray is refitted to stock location (been in trunk since '87
Sorry about the dust
Been pondering where to fit the FBO 'orange box' (that's actually black
More pics to follow after the weekend, hopefully!

Update.......update........update........
Well, just a bit
Stu's off on hols now for 3 weeks, so progress is unlikely to, erm... progress much during that time unless I get over there on my own at weekends. Not impossible but, we'll see
Before the off tho, Stu's taken some pics to show where we're up to.
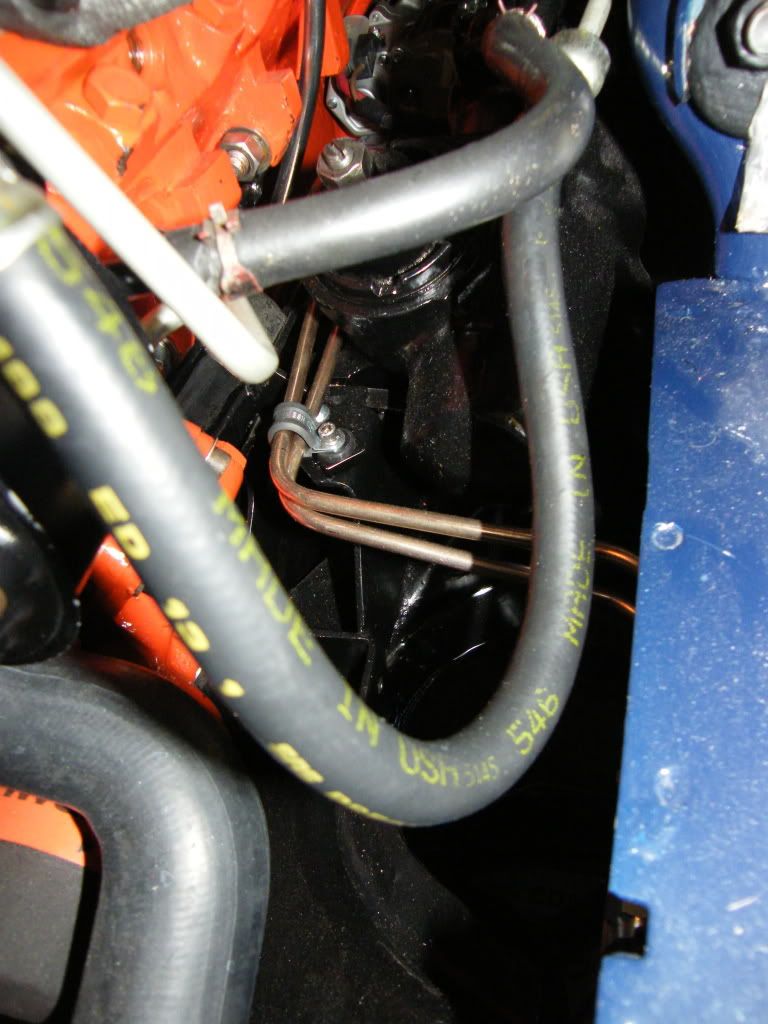
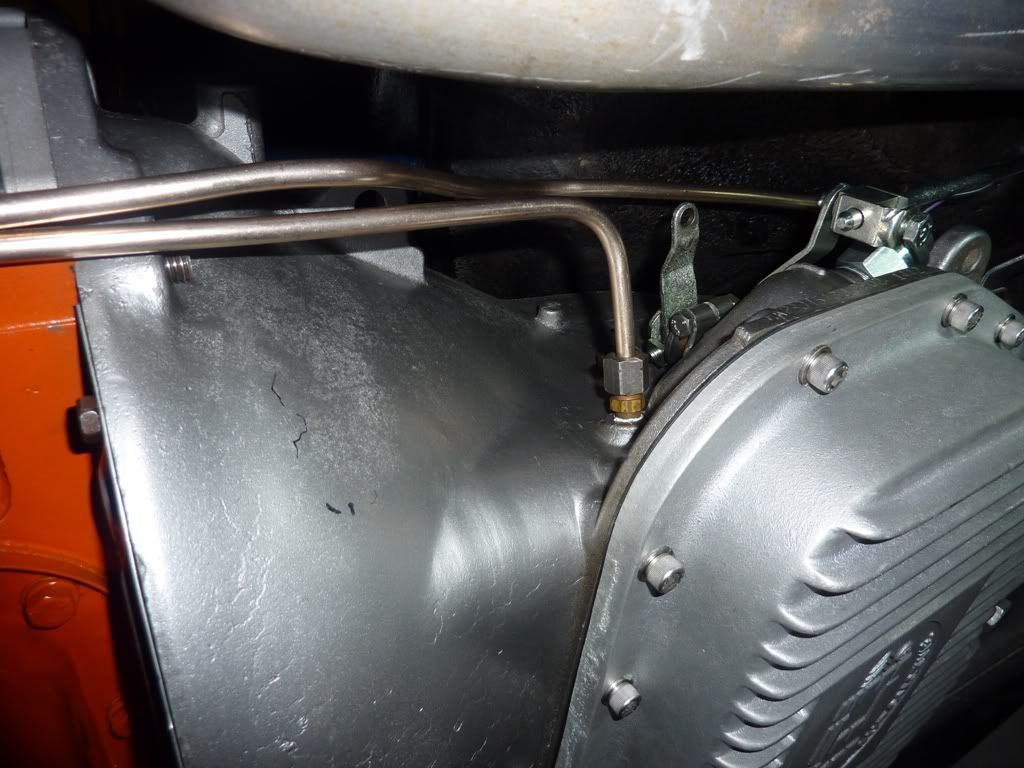
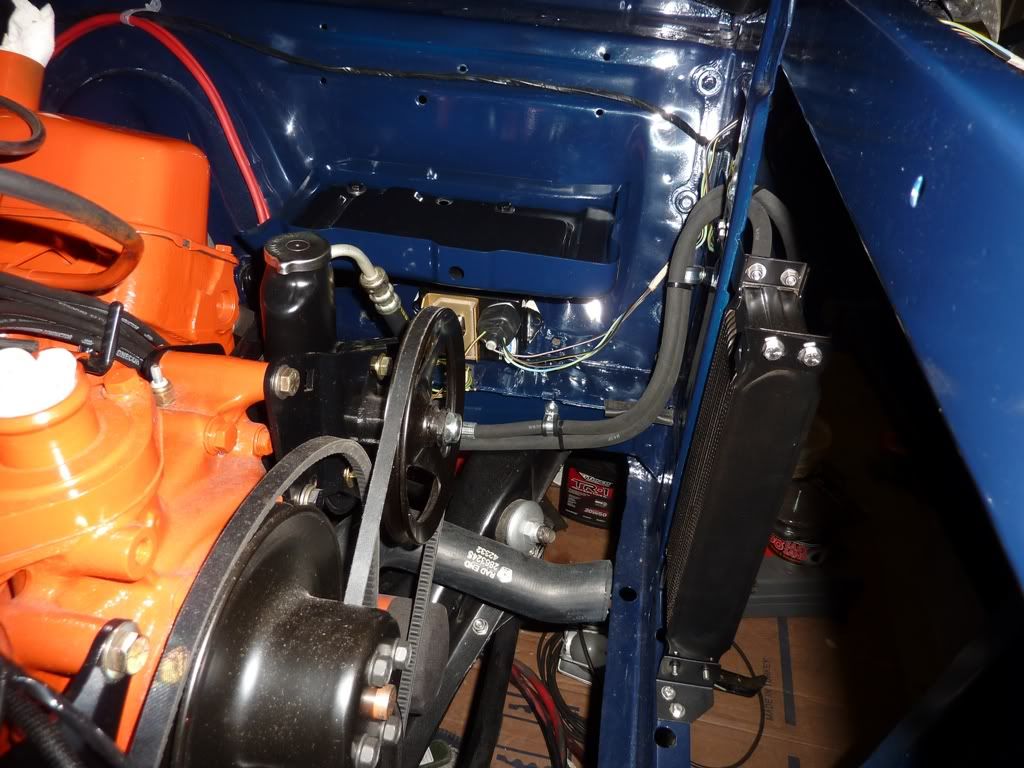
Few more trans cooler pics, inc the hard lines from the trans:
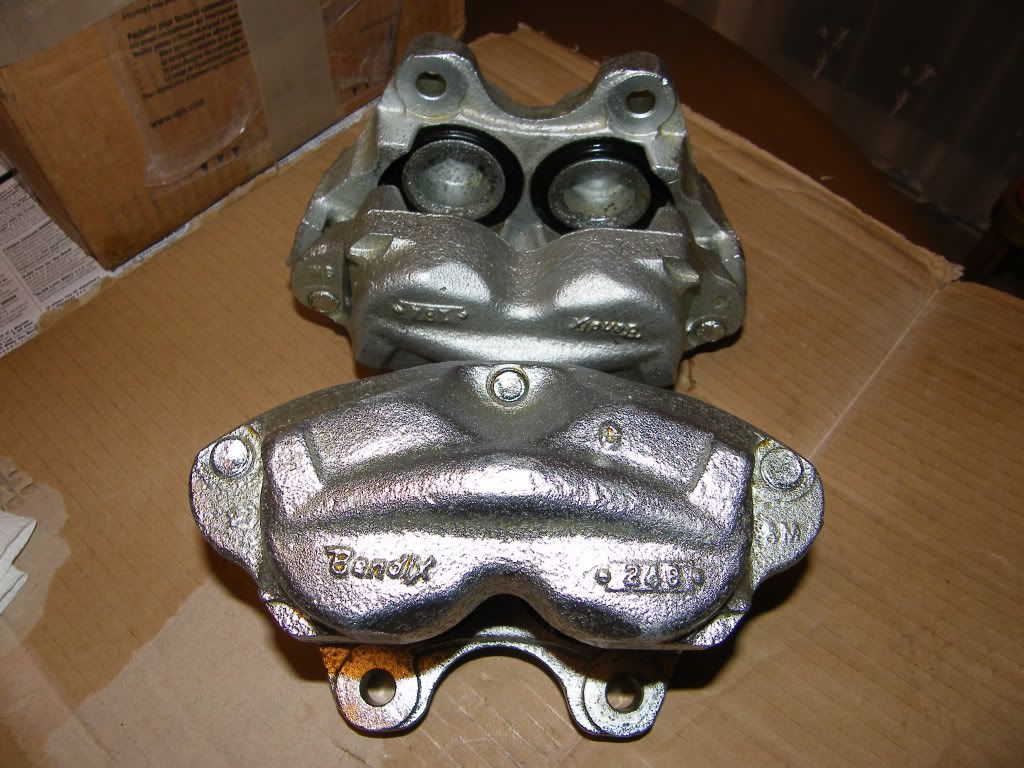
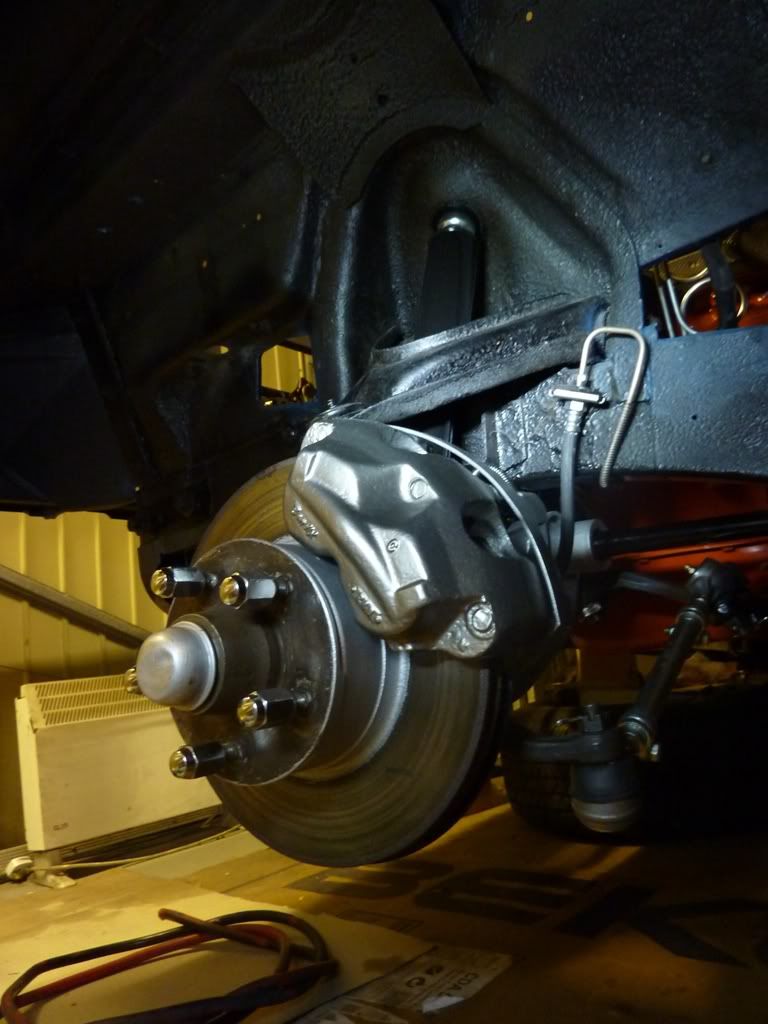
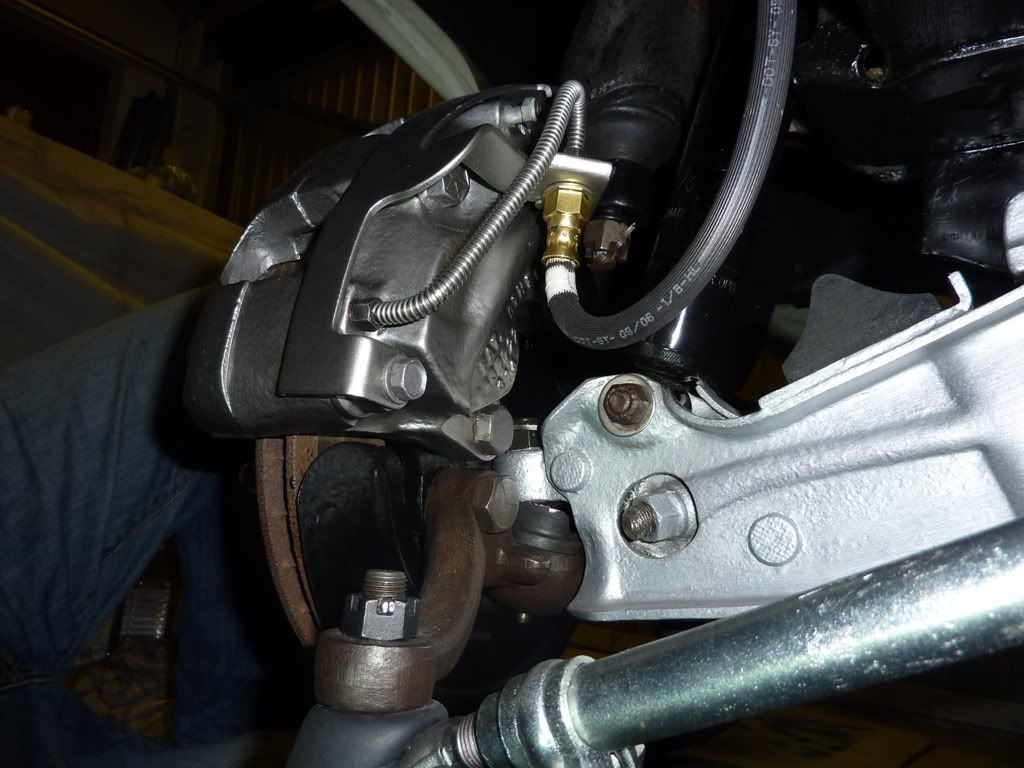
Front calipers have also been rebuilt and fitted with new hoses. Original 4-pot Bendix calipers were done by Past Parts in Bury St Edmunds http://www.pastparts.co.uk/ following a recommendation by Jon Conolly. Thanks Jon
Past Parts gave the option of either having them left natural (ie stripped & blasted), plated silver or 'gold', or powder coated silver or black.
As we wanted to try & get them looking natural but with some corrosion protection, we planned to paint them ourselves with one of the million different 'natural look' paints from Frosts, so had them plated first for extra protection.
This is how they came back from Past Parts. Any brown bits you can see are grease, not rust
Odd that the plating is 2 different shades as I'd have thought they would have got them plated together, but we werent too worried as they were going to be painted as well.
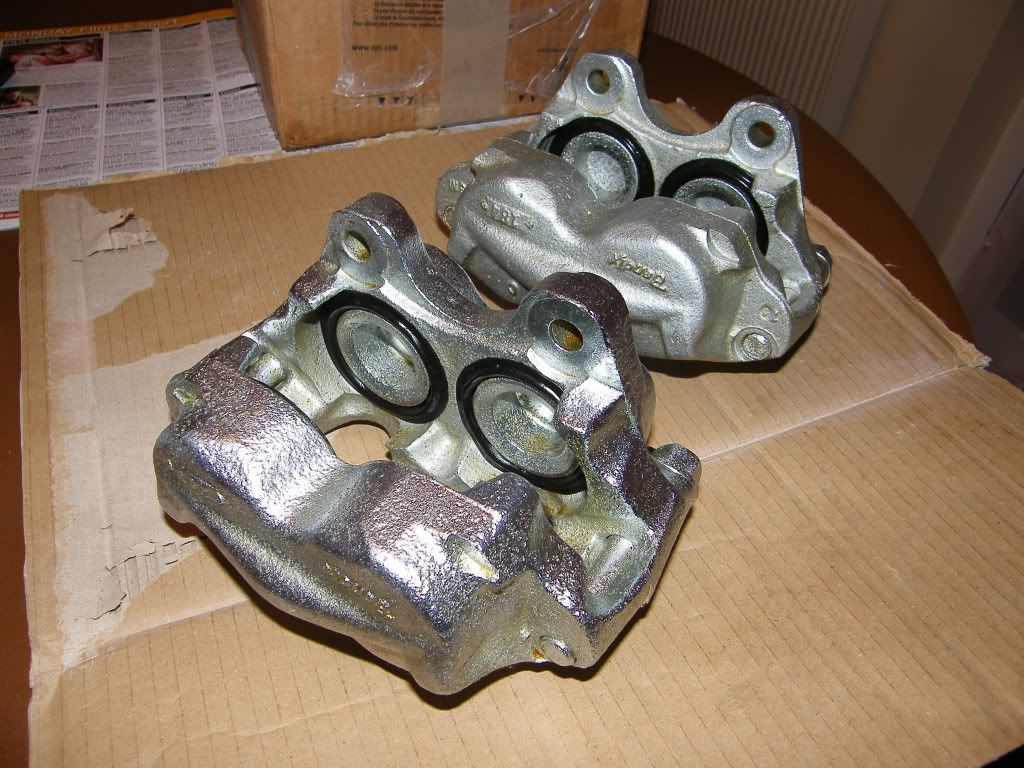
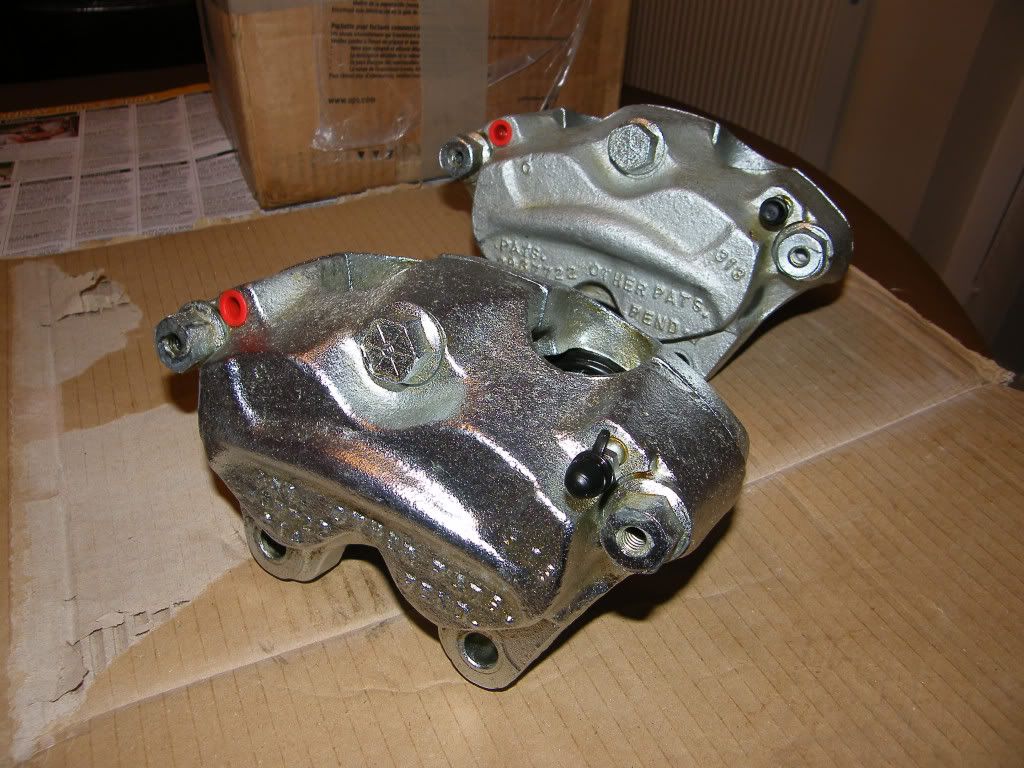
EDIT - Before pic added.
After - Rebuilt, painted & fitted
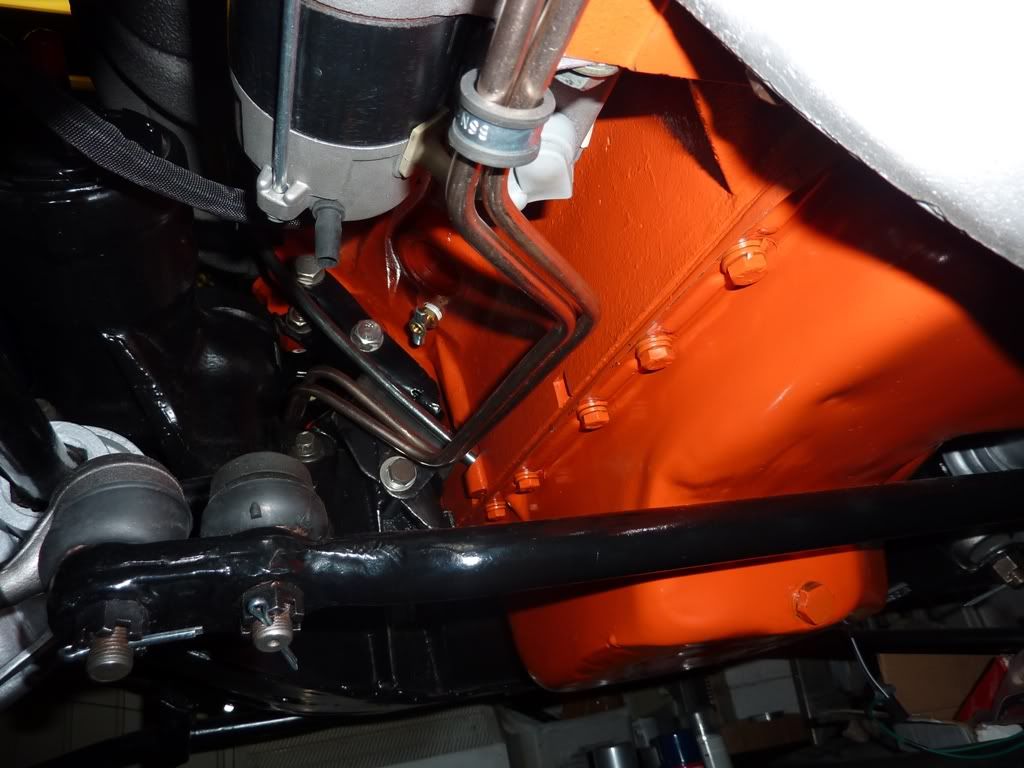
As I said before, now we have the engine paint, we've been able to finish off a few little jobs like painting & fitting the plug wire separators/brackets (from Year One) . We left the 2 off that fit under the head bolts (1 each side) as we didnt want to disturb the head bolts quite yet (they've only just been put on ferchrissakes ) plus acess is quite tricky now the exh manifolds are on. We'll leave them for a later date.
We've got a new fuel pump push-rod from Hughes but havent fitted that yet. Once that's back on, we'll refit the alternator.
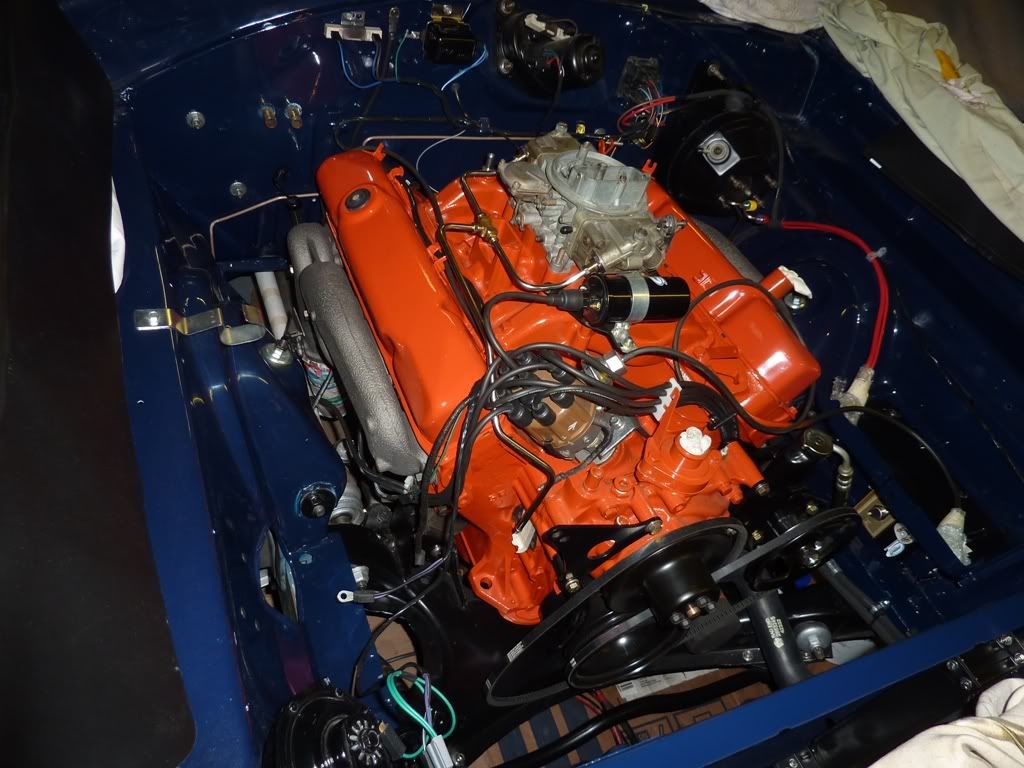
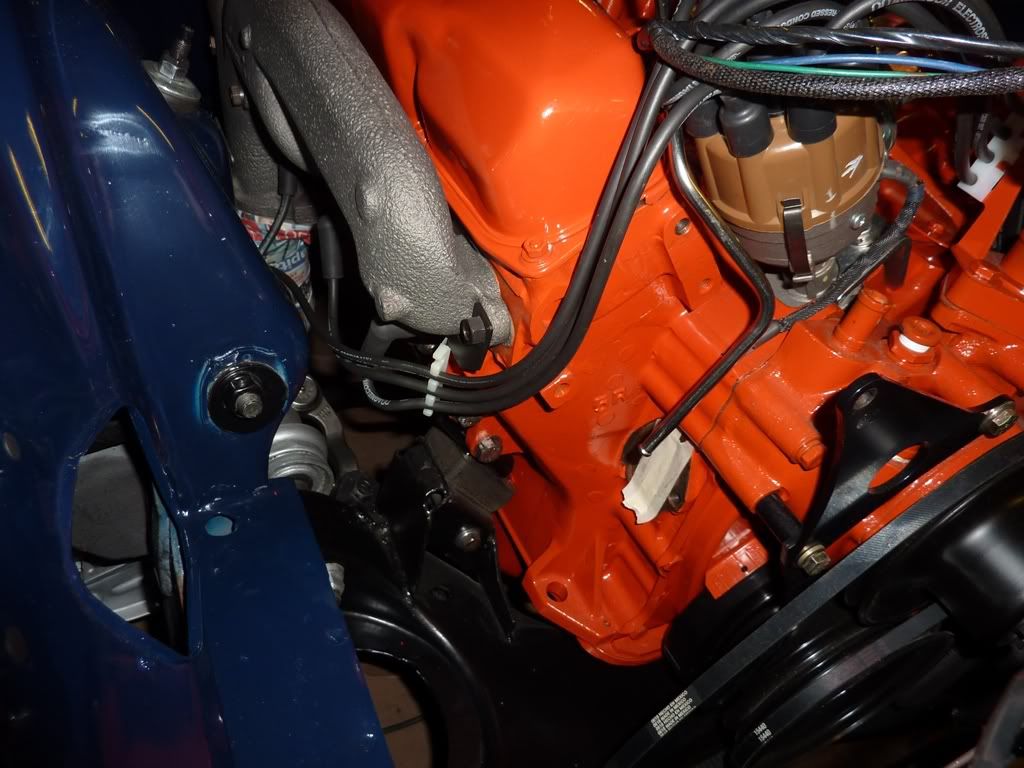

FBO 'orange' box is now fitted under the battery tray; not quite as hidden as if it were inside the car under the heater, but that's one less hole we need to add to the bulkhead. We'll extend the wiring when we get the waterproof connector, and can use existing holes in, and loom/harness route around the rad support for the wiring.
I was going to get the carb cleaned up by a friend of a friend who supposedly buys & sells carbs, and has method of getting them back to the original finish. Been trying for a few months to get my mate (colleague at work) to get it over to his mate, but with no success, so we'll use it as is (already been rebuilt), and get it cleaned up, maybe over the winter when it's in hibernation once again
Think that's about it for now. Shame that the Nats looks increasingly unlikely for this year
Maybe Duxford on Aug 19th?
Well, just a bit
Stu's off on hols now for 3 weeks, so progress is unlikely to, erm... progress much during that time unless I get over there on my own at weekends. Not impossible but, we'll see
Before the off tho, Stu's taken some pics to show where we're up to.
Few more trans cooler pics, inc the hard lines from the trans:
Front calipers have also been rebuilt and fitted with new hoses. Original 4-pot Bendix calipers were done by Past Parts in Bury St Edmunds http://www.pastparts.co.uk/ following a recommendation by Jon Conolly. Thanks Jon
Past Parts gave the option of either having them left natural (ie stripped & blasted), plated silver or 'gold', or powder coated silver or black.
As we wanted to try & get them looking natural but with some corrosion protection, we planned to paint them ourselves with one of the million different 'natural look' paints from Frosts, so had them plated first for extra protection.
This is how they came back from Past Parts. Any brown bits you can see are grease, not rust
Odd that the plating is 2 different shades as I'd have thought they would have got them plated together, but we werent too worried as they were going to be painted as well.
EDIT - Before pic added.
After - Rebuilt, painted & fitted
As I said before, now we have the engine paint, we've been able to finish off a few little jobs like painting & fitting the plug wire separators/brackets (from Year One) . We left the 2 off that fit under the head bolts (1 each side) as we didnt want to disturb the head bolts quite yet (they've only just been put on ferchrissakes
We've got a new fuel pump push-rod from Hughes but havent fitted that yet. Once that's back on, we'll refit the alternator.
FBO 'orange' box is now fitted under the battery tray; not quite as hidden as if it were inside the car under the heater, but that's one less hole we need to add to the bulkhead. We'll extend the wiring when we get the waterproof connector, and can use existing holes in, and loom/harness route around the rad support for the wiring.
I was going to get the carb cleaned up by a friend of a friend who supposedly buys & sells carbs, and has method of getting them back to the original finish. Been trying for a few months to get my mate (colleague at work) to get it over to his mate, but with no success, so we'll use it as is (already been rebuilt), and get it cleaned up, maybe over the winter when it's in hibernation once again
Think that's about it for now. Shame that the Nats looks increasingly unlikely for this year
Maybe Duxford on Aug 19th?
Last edited by RobTwin on Wed Jun 29, 11 11:41 pm, edited 3 times in total.
-
Rogue Trooper

- Posts: 1792
- Joined: Wed Feb 01, 06 8:19 pm

-
Jon Connolly
- Posts: 3116
- Joined: Fri Jan 26, 07 8:53 pm
- Location: Asleep on the tarmac ... I`m tired and emotional
Looks v. good Rob
Is there much more to do ?
Looks like you`re just about there
Is there much more to do ?
Looks like you`re just about there
9.844 @ 134.04 ... Smallblock Valiant + NOS
10.169 @ 130.17 ... Smallblock Dodge Ram pick up truck - motor only.
http://www.youtube.com/watch?v=RvwC1fd0 ... 8Z96U8t0LQ
10.169 @ 130.17 ... Smallblock Dodge Ram pick up truck - motor only.
http://www.youtube.com/watch?v=RvwC1fd0 ... 8Z96U8t0LQ
Cheers chaps
Not too much left really Jon. I'm sure in Anton's and a couple other guys hands, it would be up'n'running in a couple of weeks but with Stu away now till a week before the Nats, and me with little realistic likelihood of doing much before then, it'll drag on a bit longer than that I expect
Few bits & bobs in the engine bay, then then pretty much all of the interior needs putting back together. Elec fuel pump still needs fitting and once its wiring is in place, and run thru the inside of the car, we can get the carpet down.
Prop & exhaust need fitting too but that's no biggie.
Oh, and we're hoping the stock air cleaner will fit under the hood, with that Edelbrock Performer manifold. Hopefully wont have to resort to using a drop-base as that'll prob interfere with the coil in the position we have it.
Was hoping to get it done for Duxford on Aug 19th but may have to rethink that one
Few more little jobs done under the hood, but I'll get pics & do an update for that next time.
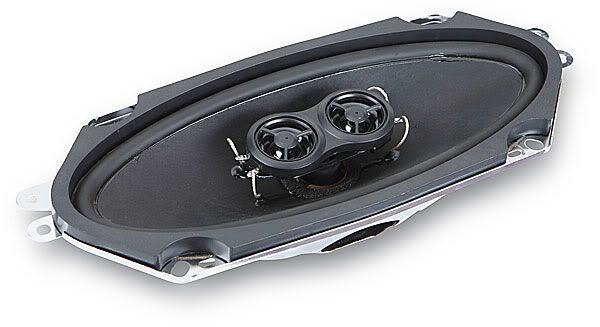
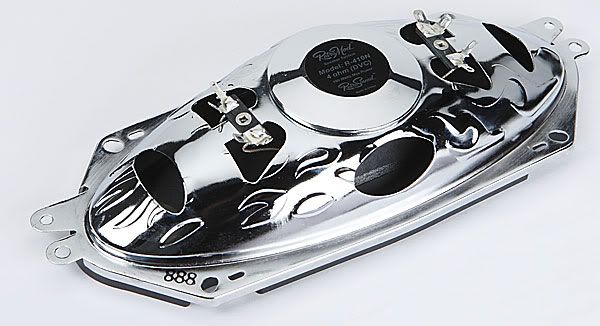
One thing that's been holding us up getting some of the interior back together is what to do about fitting front speaker(s)
We were looking at fitting a couple of 4" pod speakers I bought from the guy that rebuilt the radio, under the dash, but they're a bit too bulky, being pod speakers (ie 4" cubed, approx) so we started looking at whether we can utilise the existing single speaker in the dash.
There's a guy that posts on For A Bodies & For B Bodies who makes a plate that's the same size as the original speaker (4" x 10") and fits a couple of small speakers to give stereo sound but we've managed to find a company in the States that makes these specifically to replace the old single dash-mounted speaker.
http://www.crutchfield.com/S-0YAfrbQZuS ... html?tp=99
The bumpf says
"....The single R-410N 4"x10" speaker is designed for a classic car with only one speaker opening on its dash or rear deck. The woofer features dual voice coils, each one connected to its own tweeter. Your stereo receiver connects to both voice coils, so you get a stereo mix from a single speaker. In effect, you get two 2-way speakers in one frame, for modern sound in your vintage application...."
A bit more snooping on the net and I found a company over here that sells that make,. They dont stock the one we need, but theyre going to bring one in for us on their next shipment. We should have it in a couple of weeks. About £68 all in.
Okay, so it's not going to give the same stereo effect as if we'd fitted 2 speakers uder the dash, but that was looking like they were only going to be about 18" apart cos of all the other stuff under there (heater & controls, pedal assembly, glovebox etc). Should be good enough for what we want tho.
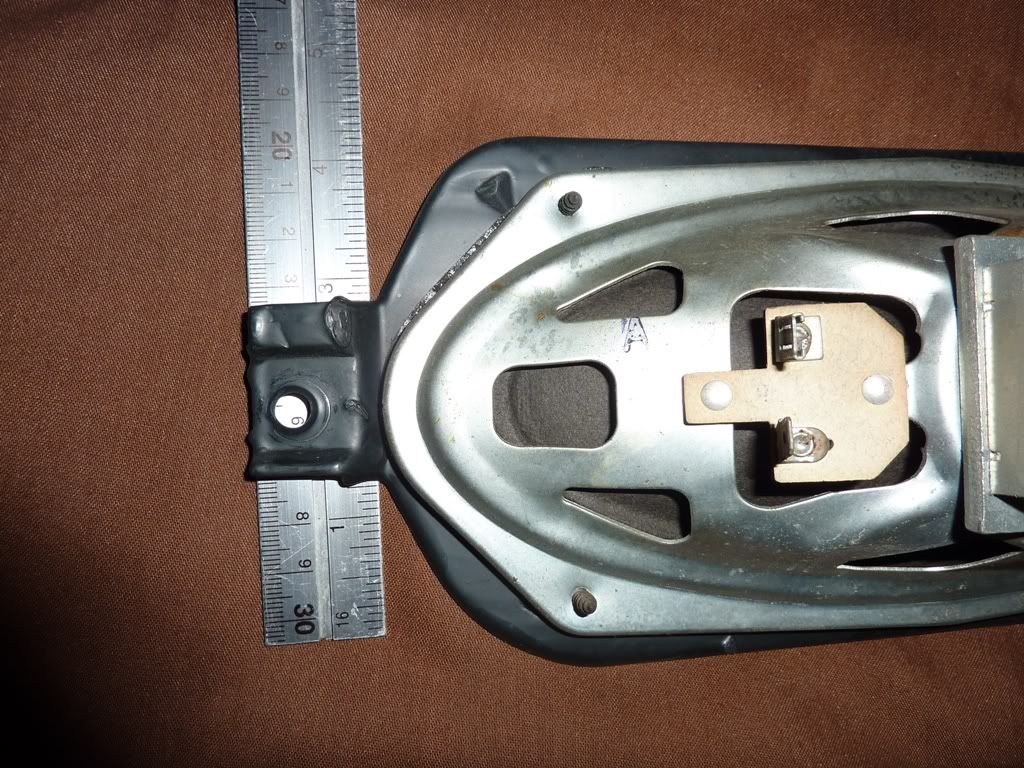
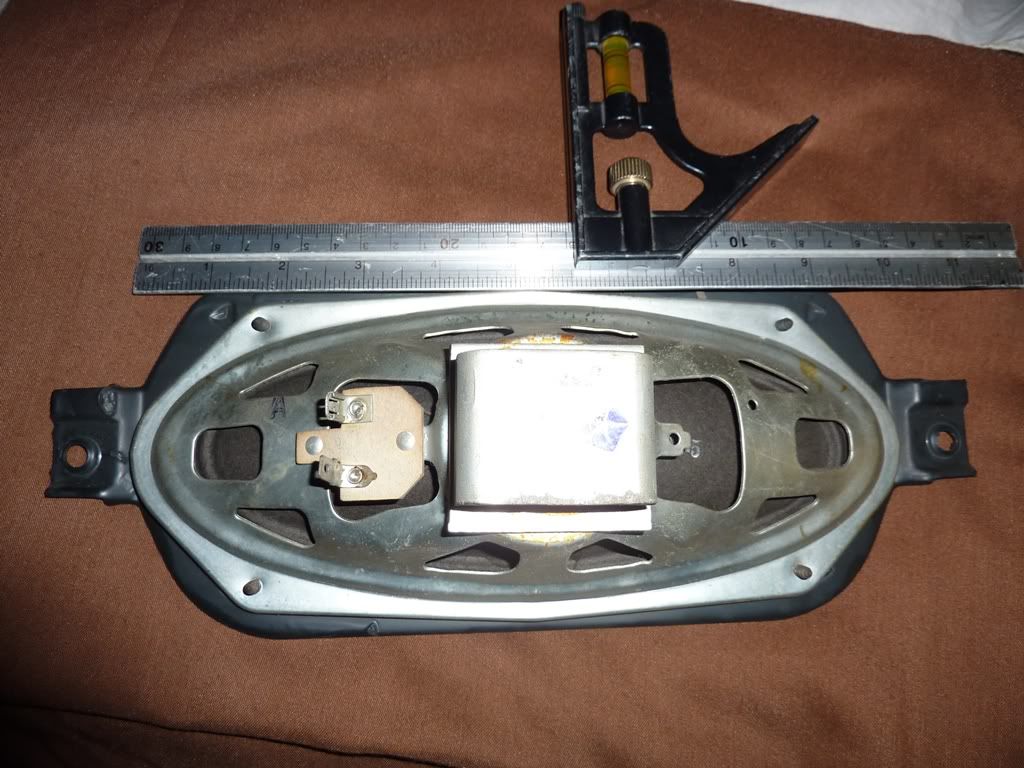
Original speaker removed:
New speaker from Retrosound:
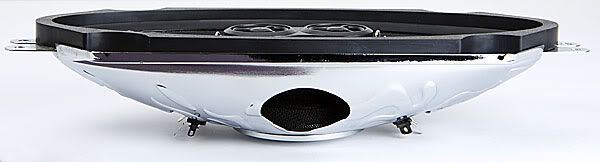
Lets hope it fits...
One thing that's been holding us up getting some of the interior back together is what to do about fitting front speaker(s)
We were looking at fitting a couple of 4" pod speakers I bought from the guy that rebuilt the radio, under the dash, but they're a bit too bulky, being pod speakers (ie 4" cubed, approx) so we started looking at whether we can utilise the existing single speaker in the dash.
There's a guy that posts on For A Bodies & For B Bodies who makes a plate that's the same size as the original speaker (4" x 10") and fits a couple of small speakers to give stereo sound but we've managed to find a company in the States that makes these specifically to replace the old single dash-mounted speaker.
http://www.crutchfield.com/S-0YAfrbQZuS ... html?tp=99
The bumpf says
"....The single R-410N 4"x10" speaker is designed for a classic car with only one speaker opening on its dash or rear deck. The woofer features dual voice coils, each one connected to its own tweeter. Your stereo receiver connects to both voice coils, so you get a stereo mix from a single speaker. In effect, you get two 2-way speakers in one frame, for modern sound in your vintage application...."
A bit more snooping on the net and I found a company over here that sells that make,. They dont stock the one we need, but theyre going to bring one in for us on their next shipment. We should have it in a couple of weeks. About £68 all in.
Okay, so it's not going to give the same stereo effect as if we'd fitted 2 speakers uder the dash, but that was looking like they were only going to be about 18" apart cos of all the other stuff under there (heater & controls, pedal assembly, glovebox etc). Should be good enough for what we want tho.
Original speaker removed:
New speaker from Retrosound:
Lets hope it fits...
I went the route of putting two 4 inch speaker in the dash and to be honest once the 6 x 9 and in the rear I can't tell that i have front speakers. The space is too tight to get a really decent set of speaker in there. I am in the process of fitting two 6 x 4 under the two front driver seat mounted to the seat so you can still move the backward and forward I will let you know how it works once I am done.