
Excellent news!
Crack on, Chap!!!
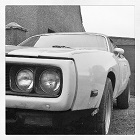
Blue's Barracuda
Moderator: Moderators
Re: Blue's Barracuda
Pete Wiseman; Cambridge.
Mopar by the grace of God
Mopar by the grace of God

Re: Blue's Barracuda
Boot floor extensions are rust free so I just used the drop off section which was mostly missing. DA and joggler on order so I won't do much more till they get here next week.
- Attachments
-
- IMG_1185.jpg (124.15 KiB) Viewed 2699 times
-
- IMG_1186.jpeg (123.54 KiB) Viewed 2699 times
“This ain’t no party, this ain’t no disco, this ain’t no foolin’ around”
Re: Blue's Barracuda
Here's my two cents for what it's worth but keep in mind I'm no professional!
I don't joggle panels. Most panels have a curve to them and the joggler tool is straight. When a panel is overlapped it is obviously twice the thickness so now this area will expand and contract at a different rate than the rest of the panel which over time could result in a ghost line appearing in the paint especially if that area has been filled.
I always butt weld and use a flap disc to bring down the bulk of the weld and then use a power file and roloc disc to bring down flush. I do this both sides. If I cannot get to the other side of the panel I will make my cut where I can get to it or remove whatever is in the way and weld it back in.
Obviously you couldn't do this with something like a frame rail unless the floor was being replaced at the same time.
I have used the joggler tool in the past but I used more filler than I would have liked and the tool kinked the panel in places requiring more work in that area. It is quicker and easier to weld then butt welding though.
Where ever possible I tack weld the butt joint then move on around the panel leaving a few inches between tacks. I then planish the welds which helps prevent oil canning and knock the top down slightly before adding another tack weld.
If I blow a hole it's usually because I've kept my finger on the trigger for too long, the panel has some residual heat or I've got impatient and rushed the job without allowing the welds to cool or planished and ground down slightly. For my settings I practice on some scrap pieces with heat and wire speed turned right down and gradually increase and adjust upwards until I get a fairly flat weld with full penetration.
I try to resist chasing the hole with more weld, it never ends well. Instead I let it cool and come back to it, clean it up and try again sometimes with a copper backer behind the hole.
You could use a copper backer or spoon as some people call it with magnets attached to hold it in place for the whole process.
I think patience is the key with this method as you will get better results requiring less filler or maybe none at all.
Like I said I'm no expert and there several ways to approach it and this is just the way that works for me. I feel it's the best way to achieve an invisible repair which is always my goal and probably why my restoration has taken two years so far!
Most of the above I have learned from other people's restoration threads and fabrication videos on YouTube!
Good luck with which ever method you go with!
Re: Blue's Barracuda
Thanks Matt, I had originally planned to butt weld thinking that's the "correct" way to do it but a couple of people are telling it's not advisable unless you really know what you are doing. I must admit the joggling method doesn't really appeal, especially the potential amount of filler work needed. You're swaying me now...
“This ain’t no party, this ain’t no disco, this ain’t no foolin’ around”
-
ScottyDave
- Posts: 1619
- Joined: Sun Mar 08, 15 9:38 pm
- Location: Dave Evans: MMA 130, Worcestershire
Re: Blue's Barracuda
Tried both methods on the Charger, Butt joins were the easiest and became the method of choice.
Some mini welding magnets are useful, something like these.
https://www.ebay.co.uk/itm/152534805051
Some mini welding magnets are useful, something like these.
https://www.ebay.co.uk/itm/152534805051
73 Charger 318
MMA-130
MMA-130
Re: Blue's Barracuda
I think a man of your calibre would be able to master sheet metal welding in no time Blue. I don't think I mentioned that some prefer no gap at the join while others prefer a slight gap. Both methods work for me. You will probably see that as the weld cools the gap will tighten up but as long the weld is not too heavy planishing the weld without hitting the panel will return the repair piece back to where it wasBlue wrote: ↑Sun Jan 31, 21 1:12 pm Thanks Matt, I had originally planned to butt weld thinking that's the "correct" way to do it but a couple of people are telling it's not advisable unless you really know what you are doing. I must admit the joggling method doesn't really appeal, especially the potential amount of filler work needed. You're swaying me now...
Always planish before taking the weld down and touch wood there shouldn't be any distortion!
Re: Blue's Barracuda
Thanks Matt, I need to stop agonising over it and just get on with it! Tomorrow I will prepare to butt weld and be done with it, I have the clamps that leave a small gap.
“This ain’t no party, this ain’t no disco, this ain’t no foolin’ around”
Re: Blue's Barracuda
If they are the same as the ones I have I find the gap is a bit wider than I prefer but I do use the thinner 0.6mm wire.
If you have any copper pipe laying around you can hammer it flat and shape it to the contour of the panel and place behind the area that is being welded.
Compressed air is good for quickly cooling your welds down before moving on to the next weld!
I hope it works out ok for you!
Re: Blue's Barracuda
Went for it! Need to spend a bit more time Tomorrow checking alignment before I weld anything, but very happy so far.
- Attachments
-
- IMG_1191.jpg (132.14 KiB) Viewed 2613 times
-
- IMG_1192.jpg (95.48 KiB) Viewed 2613 times
“This ain’t no party, this ain’t no disco, this ain’t no foolin’ around”
Re: Blue's Barracuda
That's a good fit and the cut line looks perfect!
Re: Blue's Barracuda
Thanks, that was the second cut on the new panel. For reasons I still don't understand, transferring measurements to the new panel it was obvious it would be oversized. It did allow me to clamp the panel in place to scribe a true cut line though.
“This ain’t no party, this ain’t no disco, this ain’t no foolin’ around”
-
mopar_mark
- Posts: 6709
- Joined: Fri Jul 14, 06 8:01 pm
- Location: Windlesham, Surrey
Re: Blue's Barracuda
Nice work Blue, spending the time to get it right before welding is well worth the effort & saves time in the long run
"I spent a lot of money on booze, birds and fast cars. The rest I just squandered."

Re: Blue's Barracuda
Watching  No pressure
  Take lots of photos
Re: Blue's Barracuda
Ok, you asked for it.. Started on the "good" side which turns out to be just as much of a fillerfest as the Bad side. Panel just needs a final trim and that's ready to go. Both drop offs welded in and bottom half of the rear panel removed. Just waiting for some metal to arrive to make a brace before removing the rest of the valance.
- Attachments
-
- IMG_1194.jpg (104.64 KiB) Viewed 2531 times
-
- IMG_1195.jpg (92.38 KiB) Viewed 2531 times
-
- IMG_1203.jpg (139.91 KiB) Viewed 2531 times
“This ain’t no party, this ain’t no disco, this ain’t no foolin’ around”